About Sarah Lohman

Sarah Lohman is a historic gastronomist who lives on the Lower East Side of Manhattan. She is author of the book Eight Flavors: The Untold Story of American Cuisine.

Cocktail Hour: Charles Dicken’s Punch

I threw a Charles Dickens A Christmas Carol themed dinner party for some of my friends in Cleveland this week; more details on the full menu later.  Today, I want to focus on the punch that we served, from Charles Dicken’s own recipe.

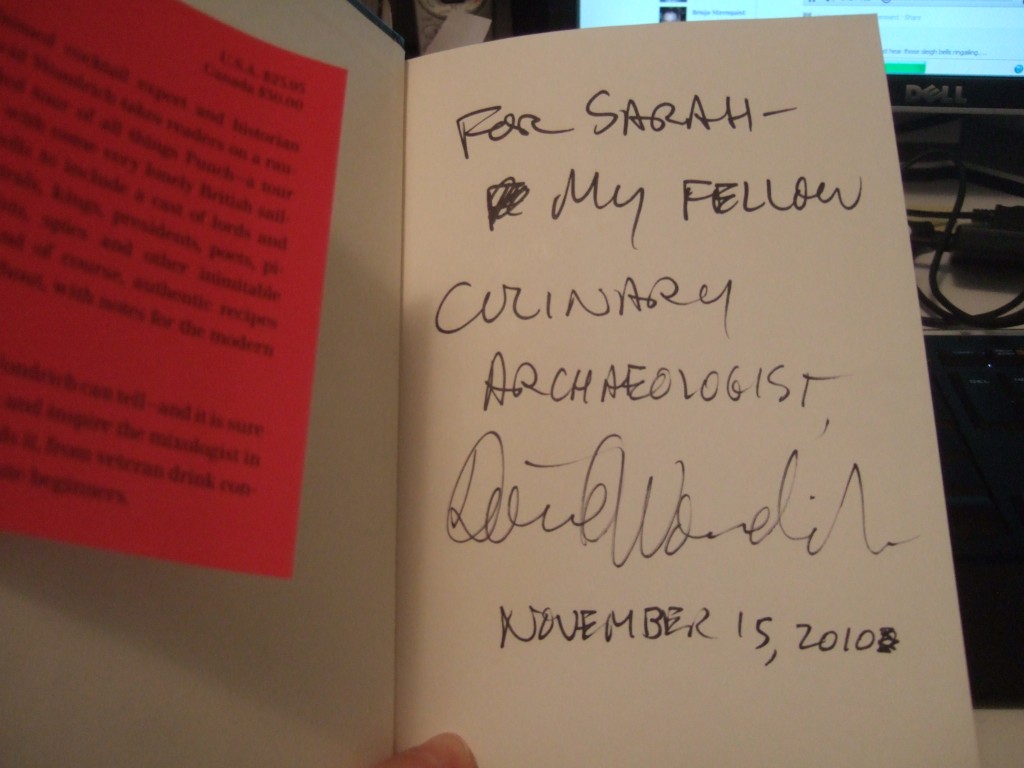
I came across the Dicken’s punch in David Wondrich’s new book, Punch!, while looking for an appropriately themed drink  for the party.  Coincidentally, NPR just did a piece on the same concoction, and published an interview with Wondrich:

“Dickens always made punch for friends,” Wondrich says. “Whenever he entertained, it was part of his ritual.”

Punch was already out of style by the mid-19th century, but that was part of the fun for Charles Dickens. The English novelist was “a great antiquarian,” says drink historian David Wondrich.
But even for Dickens in the mid-1800s, punch was something of a throwback. “By his day,” Wondrich explains, “punch had gotten kind of old-fashioned. Queen Victoria was very opposed to the lax moral standards that the upper classes in particular had held to in her predecessor’s days. And she didn’t like their habit of getting grossly drunk on punch and champagne and wine.”

So punch was out of style — but that was part of the fun. “[Dickens] was a great antiquarian,” Wondrich says. “He liked to collect all the old customs and habits of old England.” So he’d invite his friends over, concoct a big bowl of punch, and then describe the punch-making process for his guests. (read the full article here)

This punch recipe came from a letter Dickens wrote to his friend, Amelia Filloneau in 1847.  The full text of the original recipe is below, followed by my modernized version (based on suggestions from both Dickens and Wondrich).  It’s a standard punch recipe, the kind made better by rubbing the sugar on the rinds of the lemons and substituting green tea for the hot water.

We found the punch to be on the sweet side, so consider initially adding less sugar and then sweetening to taste.  Overall, it’s a delightful treat to take to your New Year’s party tonight.

***
Charles Dicken’s Punch

Adapted from a letter from Dickens to Amelia Filloneau, 1847.
From the book Punch: The Delights and Dangers of the Flowing Bowl by David Wondrich.

Peel into a very strong common basin (which may be broken, in case of accident, without damage to the owner’s peace or pocket) the rinds of three lemons, cut very thin, and with as little as possible of the white coating between the peel and the fruit, attached. Add a double-handfull [sic] of lump sugar (good measure), a pint of good old rum, and a large wine-glass full of brandy — if it not be a large claret-glass, say two. Set this on fire, by filling a warm silver spoon with the spirit, lighting the contents at a wax taper, and pouring them gently in. [L]et it burn for three or four minutes at least, stirring it from time to Time. Then extinguish it by covering the basin with a tray, which will immediately put out the flame. Then squeeze in the juice of the three lemons, and add a quart of boiling water. Stir the whole well, cover it up for five minutes, and stir again. At this crisis (having skimmed off the lemon pips with a spoon) you may taste. If not sweet enough, add sugar to your liking, but observe that it will be a little sweeter presently. Pour the whole into a jug, tie a leather or coarse cloth over the top, so as to exclude the air completely, and stand it in a hot oven ten minutes, or on a hot stove one quarter of an hour.  Keep it until it comes to table in a warm place near the fire, but not too hot. If it be intended to stand three or four hours, take half the lemon-peel out, or it will acquire a bitter taste.  The same punch allowed to cool by degrees, and then iced, is delicious. It requires less sugar when made for this purpose. If you wish to produce it bright, strain it into bottles through silk. These proportions and directions will, of course, apply to any quantity.

(Doubled, for a party of 20)

Zest and juice of 6 lemons
3 cups sugar (or simple syrup)
4 cups rum (about 1 liter)
1 1/5 cups cognac (about 1/4 liter)
2 quarts boiling water

1. Pare the zest off of the lemons, being careful to get as little as the bitter white as possible.  Add to a heat-safe bowl or pot, along with simple syrup.  Add alcohols.

2. Gently warm a metal spoon (for example, over a stove burner).   Take a spoonful from the alcohol mixture and gently light the spoon with a match or candle.  Pour the spoonful of flaming liqour back into the larger bowl.  “Let burn three or four minutes, stirring it from time to time.”  Extinguish flame by covering the bowel with a tray or lid.

3. Squeeze the lemon and add the juice to the punch, being careful not to add any seeds, or to strain them out immediately. Add boiling water.

4. Taste; if not sweet enough, add additional sugar. Warm over a stove top burner or hotplate on low for fifteen minutes before serving.
Cookie Week: Cardamom Rosewater Cookies


This will be the last post for Cookie Week, which will hopefully also allow me to stop devouring cookies.  I’m on holiday vacation through New Years, so my consumption of holiday treats is slackening at a snail’s pace.

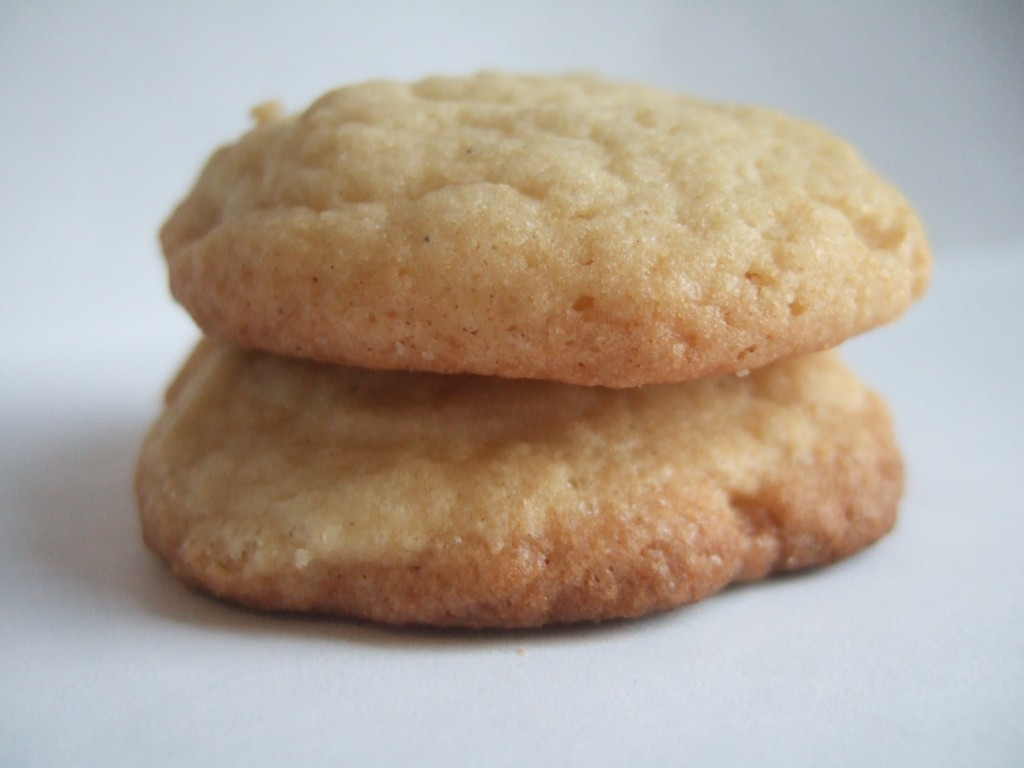
But if you are going to make one more sweet this season, I’d recommend  these cookies.  They taste beautiful. 

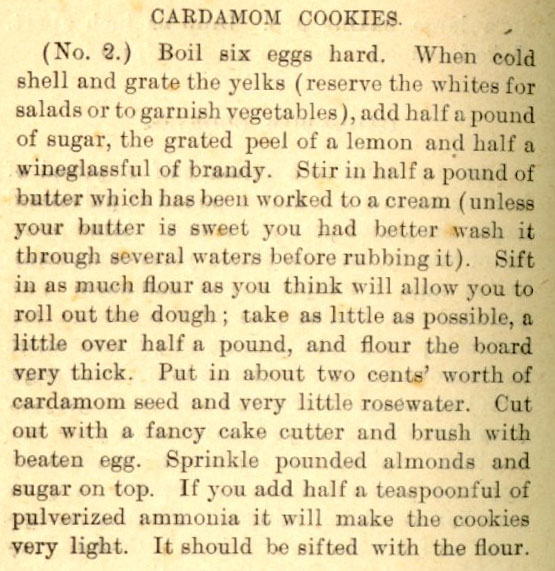
The original recipe is fairly complex.  Here:  

If anyone has an explanation for the grated boiled eggs yolks, I’d love to hear it.  Has anyone ever seen anything like it in a recipe before?  When my mother and I were doing some holiday baking, we experiemented with this technique in another cookie recipe and the result was revolting: dense, dry cookies with a distinctly hard-boiled taste (although roommate DK loved them).

But what I loved about this cookies recipe was the flavor combination: cardamom, rosewater, and brandy.  Definitely 19th century but daring to the modern pallette.  I decided to focus on the flavors of the recipe, not the technique, and retronovate a modern sugar cookie recipes to incoporate a taste of the past.

***
Cardamom Rosewater Cookies
Adapted from “Aunt Babette’s” Cook Book by “Aunt Babette”, c1889.
Modern recipe derived from Martha Stewart’s Cookies.

3 cups all-purpose flour
1 teaspoon baking soda
1/4 teaspoon salt
1 tsp ground cardamom
1 1/2 cups granulated sugar
1/2 cup packed light-brown sugar
1 cup unsalted butter (2 sticks), softened
2 large eggs
1 tsp rosewater
1 tsp brandy
Zest of one lemon
Sanding sugar, for sprinkling

1. Preheat oven to 350 degrees. Whisk flour, baking soda, cardamom and salt into a bowl; set aside. Beat eggs with rosewater, brandy, and lemon zest; set aside.

2. Using an electric mixer, beat sugars and butter at a medium speed until pale and fluffy. Add eggs until mixed. Scrape down bowl with a rubber spatula

3. Reduce mixer speed to low and gradually add flour mixture. Mix until just combined.

4. Scoop dough into a Ziploc bag or sheet of plastic wrap. Form into a ball and refrigerate for at least an hour.

5. Either roll dough into 1 inch balls and place on a baking sheet; or, roll and cut cookies.  On a generously floured surface, roll out 1/4 of the dough until it is 1/4 inch thick. “Cut out with a fancy cake cutter,” and place on a baking sheet.  Brush with egg white and sprinkle with sanding sugar and/or chopped almonds.

6. Bake for 7 minutes, turning half-way through.

***

This cookie isn’t for everyone.  It won’t satisfy your chewy/chocolate/nutty holiday treat cravings.  But the flavor is unique and surprising: a refreshing palette cleanser after a month of heavy eating.

Cookie Week: Chocolate Lebkuchen

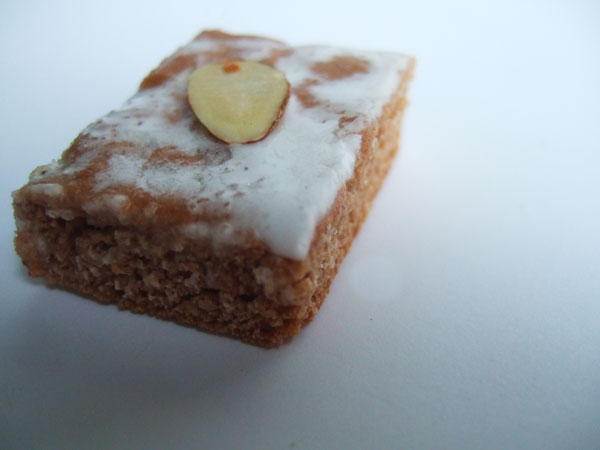
Lebkuchen are a highly spiced German cookie often associated with the holidays.  They’re often very regional and can variously contain fruits, nuts, alcohol, and spices; but are almost always made with honey.  They’re like a combination gingerbread and fruit cake: highly spiced, better with age, and something your grandmother loves to eat.

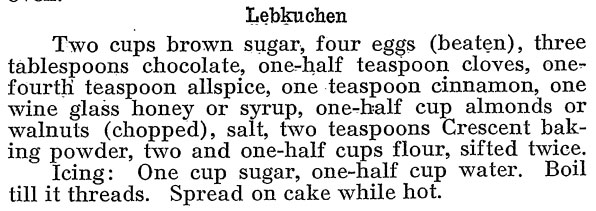
So I decided to give them a whirl this holiday season and cruised Feeding American for an interesting recipe:

This ‘kuchen recipe comes from the 1914 edition of The Neighborhood Cook Book; what I found intriguing was the use of cocoa, which I had never seen before.  In the end result, the cocoa doesn’t produce a chocolate flavor, but mellows the intensity of the rest of the spices.  The recipe below will make about 100 small cookies which will taste better if left for two weeks in a sealed container before consumption.  Everyone loves eating food that’s been sitting around for two weeks, right?

***
Chocolate Lebkuchen
From  The Neighborhood Cook Book Compiled by the Council Of Jewish Women, 1914.
Adapted for the modern kitchen by Karen Lohman

½ cup honey
2 cups firmly packed brown sugar
4 large eggs
4 cups all-purpose flour, spooned into cup and leveled
3 Tb. Dutch-processed cocoa powder
2 tsp. baking powder
1 tsp. cinnamon
½ tsp. cloves
¼ tsp. allspice
½ tsp. salt
½ cup almonds, finely chopped

1.   Preheat oven to 350°.  Adjust rack to middle position.  Line 8-inch square baking pan with parchment paper, allowing paper to extend over sides.

2. Whisk together flour, cocoa, baking powder, cinnamon, cloves, allspice and salt.

3.   Using a heatproof, glass measuring cup, heat honey in microwave at 50% power for 1 minute.  Pour into bowl of electric mixer.

4.   Beat in brown sugar until well combined.  Beat in eggs, one at a time.  Scrape down bowl.

5.   Stir in ½ of the flour mixture and almonds just until combined. Do not over mix.  Stir in the rest of flour mixture.

6.   Wrap dough in plastic wrap and chill overnight. 

7.   Work with one quarter of the dough at a time.  Return unused portion to refrigerator.  With buttered hands pat dough into parchment lined baking pan (a floured spatula or the bottom of a drinking glass can help level the dough).

8.    Bake at 350° for 20 minutes, rotating pan once, until no indentation remains when touched.

9.   Allow lebkuchen to cool one minute in pan.  Lift the lebkuchen out of the pan using the overhanging parchment.  Carefully peel parchment off of the bottom of the lebkuchen.  Using a thin bladed, sharp knife, trim ¼ inch off all four sides of the lebkuchen.  Cut the lebkuchen into twenty-five 1½ inch by 1½ inch bars.  Brush with sugar glaze; top with almond slice while glaze is still warm.

Glaze:

Mix 1 cup granulated sugar and ½ cup water in a small saucepan.  Allow mixture to come to boil over medium heat.  Cover saucepan for 2 minutes to allow steam to wash sugar crystals from sides of pan.  Remove lid and continue to cook until the syrup reaches 230° on a candy thermometer.  Remove from heat and transfer to a heatproof, glass measuring cup.  Brush cookies with glaze.  If glaze recrystallizes after brushing cookies, reheat one minute on high in microwave, adding ½ tsp. of water, if necessary.

Cookie Week: Maple Sugar Cookies

These cookies: they are AMAZING.   You will become addicted to Maple Sugar Cookies.  You will NEED them.
The original recipe can be found here, in the 1909 edition of the Good Housekeeping Women’s Home Cookbook.  I love maple– not maple flavoring, but real maple sugar.  The cookies use 1 cup granulated maple sugar plus 1 cup sugar; you can play with the proportions for a less sweet combo, but the general consensus amongst my taste-testers was that the sugar level was good.  Rolled out thin and cut into shapes, these cookies bake up perfectly crispy, with a melt-in-your mouth buttery texture, and with an absolutely ideal maple flavor.
Maple sugar, by the way, can be purchased off the King Arthur Flour website.  8 oz. is enough to make 1.5 recipes.  I had never seen ground maple sugar before–it’s powdery and dusty and not at all what you’d expect.  But a few dollops of maple flavoring are NOT a good substitution.  If you want to make these, get the real thing.  It’s imperative.
Out of all the cookies I baked this season, these cookies were the hands-down favorites.  Make them today.  It will divide your life into the time before Maple Sugar Cookies and after.
***
Maple Sugar Cookies
From The Good Housekeeping Woman’s Home Cook Book. Arranged By Isabel Gordon Curtis, c1909.
Recipes adapted for the modern kitchen by Karen Lohman.
(Makes 8 dozen two-inch cookies.)
1 cup (2 sticks) unsalted butter, at cool room temperature
1 cup granulated sugar
1 cup granulated maple sugar (purchase here)
2 large eggs
1 tsp. vanilla extract
3 ½ cups all-purpose flour, spooned into cup and leveled
2 tsp. baking powder
1/4 tsp. salt
1. Preheat oven to 375°. Adjust rack to middle position. Line cookie sheets with parchment or lightly grease.
2.Whisk together flour, baking powder, and salt.
3. Cream butter and sugar with an electric mixer at medium speed until light and fluffy, two minutes.
4. Add vanilla and eggs, one at a time, beating until well combined, scraping down bowl after each addition.
5. Stir in ½ of the flour mixture just until combined. Do not over mix. Stir in the rest of flour mixture.
6. Chill dough until firm, 2-4 hours, or overnight.
7. Work with one quarter of the dough at a time. Return unused portion to refrigerator. Generously flour pastry board and rolling pin. Roll dough 1/8 inch thick, checking frequently to be sure dough is not sticking.
8. Cut with a shaped, 2-inch cookie cutter, dipped in flour. Place one inch apart on baking sheet. Bake at 375° for 9-10 minutes, until deep golden brown around edges. Cookies are fragile. Cool 3 minutes on baking sheets before moving to cooling rack.
***
By the way, Four Pounds Flour is two years old!  Thank you friends, old and new, for continuing to encourage me to write.  The blog has grown so much in the past year and I have loved every moment.  Writing here has changed my life; I hope, at least, it has been fun for you, too.

Cookie Week: Snippodoodles

Proto snickerdoodle?

I know I’ve been doing a lot of baking recently.  But it is Christmas and all I want to do is jam my maw with sweets.  So welcome to Cookie Week!

On Sunday, I appeared on the Heritage Radio Network’s show We Dig Plants, talking with hosts Carmen Devito & Alice Marcus Krieg about the salacious history of cloves and cinnamon.  Listen to the full 30 minute show for free here.

I got curious about the history of the Snickerdoodle cookie: when we’re talking cinnamon in baking, the Snickerdoodle is king.  For those of you that don’t know, the Snickerdoodle is a crispy combination of cinnamon and sugar.  No other baked good features the flavor of cinnamon so prominently.

I began poking around for a little information on the origin of the Snickerdoodle.  There’s some vague sense on the internet that it was invented in the 19th century, but there’s a lot of back and forth about where the name came from: what German word it descended from, what cookies were called Snickerdoodles before.  To me, that’s unimportant.  What’s interesting about the Snickerdoodle is that it’s just a cinnamon cookie.    No bells and whistles. No currents. No rosewater.  No 50 spice blend.  It’s a cookie entirely different than all other 19th century cookies.

So I went to Feeding America, an online archive of the most important cookbooks of the 19th and early 20th century cookbooks, and I punched “Snickerdoodles” into the search.  No hits.  This usually a bad sign, as it often indicates a recipe did not evolve in the 19th century.  Then I shortened my search to just “doodle,” and got this:

Not only does this appear to be a proto-Snickerdoodle recipe, but it also seems to indicate that the cookie came before the contemporary name.

So I put the Snippodoodle to the test.

What makes this recipe unique is that its baked in a sheet, then cut, as opposed to a modern Snickerdoodle which is rolled into a ball and dipped into cinnamon sugar.  My cookies did not come out thin and crispy, as the recipe suggests, but cakey and a little chewy.  I should note that I made one major substition: I starting mixing up my batter only to discover that I was out of milk.  I had already been to the deli once to get eggs and I just couldn’t convince myself to go back out into the cold.  I opened the fridge: I didn’t have milk, but I did have homemade, boozey, creamy eggnog.  Done and done.

***
Snippodoodles
From Good Things to Eat by Rufus Estes, 1911.

1 cup white sugar
1 tablespoon butter
1/2 cup milk (or eggnog)
1 medium egg
1 cup flour
1 teaspoon cinnamon
1 teaspoon baking powder

1. Preheat oven to 325 degrees.

2. Sift together flour, cinnamon, and baking powder (or just throw it in a bowl and whisk it if you’re lazy like me).

3. Whisk together milk and egg.

4. With mixer on medium speed, cream together butter and sugar for 30 seconds.  Scrape bowl.

5. Add milk and eggs; mix until combined.

6. With mixer on low, slowly add flour mixture.  Mix until fully combined.

7. Using a spatula, or buttered fingers, spread/press the mixture into a 9 x 13 baking pan.  It will seem thin, but don’t worry.  It’s supposed to.

8. Bake thirteen minutes.  Remove from oven and allow to cool for 20 minutes.  Slice into squares and remove to a rack to cool.

***

Delicious? Yes.  Does the Snippodoodle surpass the modern Snickerdoodle in texture in flavor?  No.  It’s a good cookie, but not an improvement.  However, is substituting eggnog for milk in a cookie recipe a good idea?  Yes, it’s an awesome idea.  And I think that’s a lesson we all can learn.

Cocktail Hour: How to Make Simple Hard Cider

Homemade hard cider: quick and dirty.

I’m always interested in simple, quick, boozey experiments that I can do in my limited-space apartment.  If you are too, then grab a gallon of apple cider and a little yeast, and you too can make booze at home.

I had conceptualized with some friends the idea of making hard cider from store bought pressed cider.  If you can find unpasteurized cider, then turning it into alcohol is as simple as leaving it out of the fridge.  But your average, grocery store cider will work, too.  Mike suggested buying some champagne yeast and following Alton Brown’s directions for Ginger Beer.

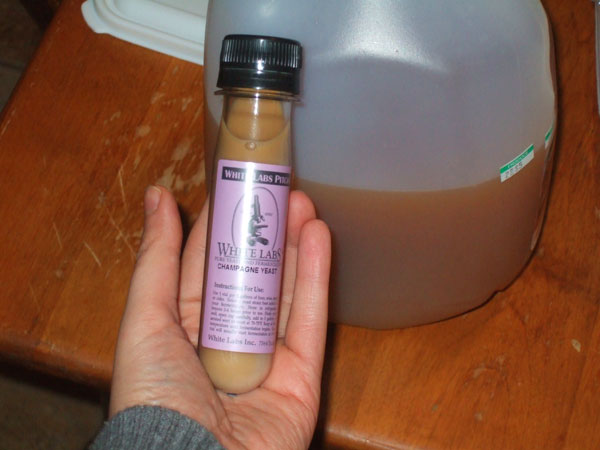
The Whole Foods in Manahattan carries brewing supplies in their beer section; so all it took to acquire the correct yeast was a quick conversation with a knowledgeable clerk (my trips to Whole Foods are becoming less and less painful; I wonder if I’m gentrifying?).  He sent me away with “White Labs Pitchable Liquid Yeast,” a champagne yeast in a test tube.  The entire tube is enough for five gallons of booze.

All the equipment needed.

After swinging by the grocery store to pick up a gallon of cider, I returned home and helped myself to a glass.  I needed to make room in the jug for the yeast to expel gas.  Then, I tipped about a tablespoon of yeast into the jug. Following Brown’s instruction, I capped the jug, shook it up, and left it out on my counter for 48 hours.  Then, I put it in the fridge for two days, popping the lid off to release the carbonation once a day.

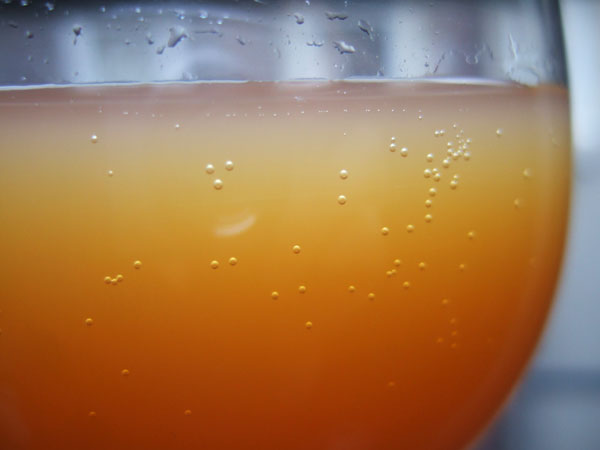
It was as simple as that.  After four days, I poured myself a glass and it tasted just like store bought hard cider.  It had a bit of a thicker mouth feel, and the nose was reminiscent of apple cider vinegar (now more so, after sitting in the fridge a couple more days).  It wasn’t very carbonated, but did have a few bubbles and felt zingy on the tongue.  I think if I had brewed it in a glass jug, it would have carbonated better (Home brewers? Is that true?)

I have no way of testing the alcohol content, so I don’t know if I could actually get sloshed off of my homemade cider; but it was fun to do and it tastes good.   Give it a whirl yourself, and let me know how it turns out!

The History Dish: Matzo Meal Pie Crust

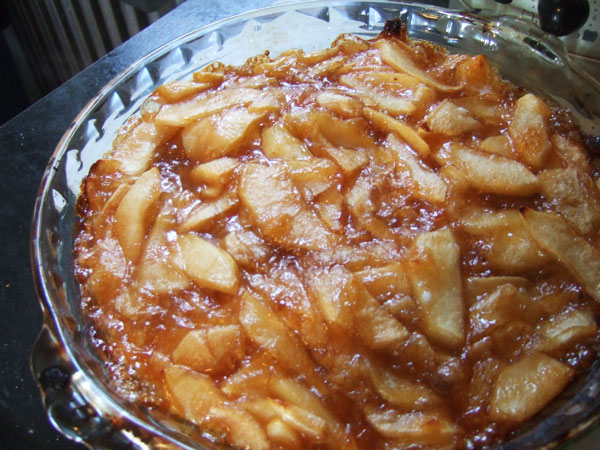
Apple pie with a matzo meal crust.

Back in September, I was asked to represent the Lower East Side Tenement Museum at Apple Day.  Apple Day pays tribute history of the Lower East Side, which in the 1700s was  part of Mr. Delancy’s farm and  included a sizable apple orchard.  My assignment was to feature apple dishes that reflected the neighborhood’s immigrant history.

I was immediately put in mind of a cookbook I’ve talked about beforeBa’ṭam’ṭe Yidishe maykholim; or, Tempting Kosher Dishes.  The book is now online thanks to the Steven Spielberg digital Yiddish library.

Ba’ṭam’ṭe Yidishe maykholim is a perfect example of Americanization and assimilation through the dinner table.  Released by the Manischewitz company in 1944, the slender cookbook is written in both Yiddish and English and features Kosher for Passover recipes for classic American dishes like Boston Cream Pie.

Someday soon, I will cook many more recipes from the book. But on the morning of Apple Day, I decided to tackle Matzo Meal Pie Crust.

This recipe starts wierd and gets weirder.  I put my matzos in a bowl and covered them with water until they got squishy; then, with my hands, I tried to squeeze out as much water was possible.  The result was a pile of moosh.  Why I had to do this, I’m not sure, because the next step is to dry the matzos back out.

I toasted the matzos in a skillet.  The recipe requested I use “fat” which means “schmaltz” which means “chicken fat,” which sadly I didn’t have.  So I used a tablespoon of Crisco instead.  Crisco is also kosher and released their own bi-lingual cookbook.

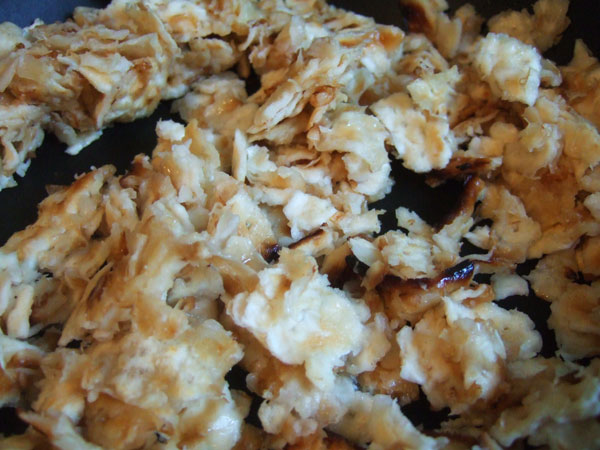
I toasted the matzo crumbles until they  looked dry:

Matzos wet, then dried again, in a skillet with Crisco.

The next step in the recipe is where things took a turn for the worse.  I mixed the toasted matzo crumbles with all the other ingredients which turned it back into moosh. Really runny moosh.  There was no way I could “press it into a pie plate with hands” because it was just liquid.  A mess.  It occurred to me I was using large eggs and perhaps medium eggs were a more appropriate size.  So I decided to scrap my messy disaster and start all over, from the top, with new matzos soaked in water.

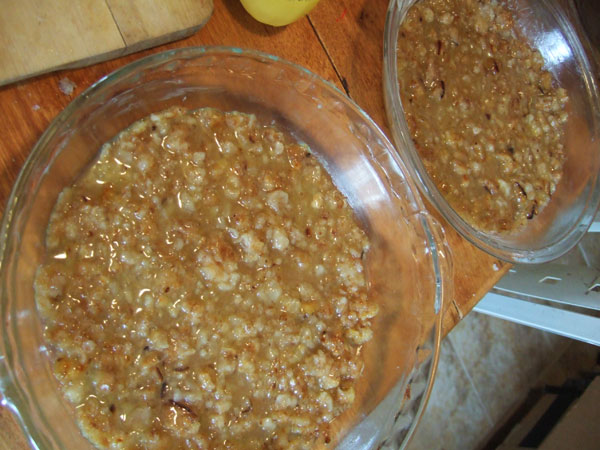
I made you puke pie.

The second time around I used one egg instead of two and it was still a runny, goopy mess.  Usually, when something I make looks that much like puke, I call it quits.  But the fact of the matter was I had to be at Apple Day in about two hours.  So I poured my goop into two pie plates and slide it in the oven to pre-bake it before the filling went in.

I put it in at 350 degrees for about 20 minutes.  In the meantime, I prepared a basic apple filling.

When I took the crust out of the oven, it looked better, but still suspect.  It had, a least, formed into something crust-like.

I poured in the apple filling and put it back in the oven for another 15 minutes.  This time, when it came out, it looked rather glamorous.  I wrapped it up and carted it off to Apple Day.

In the end, this crust was a real surprise.  At the event, I cut the pie and scooped out a serving to taste test.  The crust was almost meringue-like: sweet and crunchy, but a little chewy, too.  Like apple pie over macaroon cookies.  Really, really good.

To be honest, I’d make this crust again, although I’d try to figure out if I could cut out some of the mush to dry to mush to dry steps.  It was a real shocker that something that looked so much like a throw-up could end up tasting so delicious.

Retronovated Recipes: Make Yourself a Ham and Apple Cornbread Sandwich

Toasted apple cornbread, melted butter, and hot ham.  Sound ok to you?

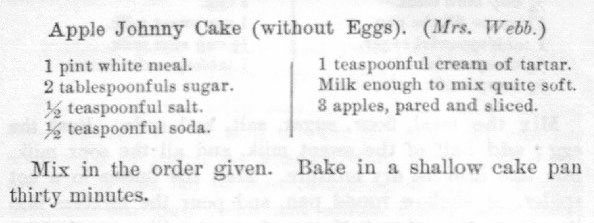
I served this delicious sandwich at an 1864-style baseball game where  I was charged with providing a few period-appropriate concessions.  I was inspired to create this flavor combo after stumbling across this recipe (albeit from 1884) from Mrs. Lincoln’s Boston Cook Book for Apple Johnny Cake:

Apples stirred in to cornbread? Awesome!  Why had I never heard of this before?

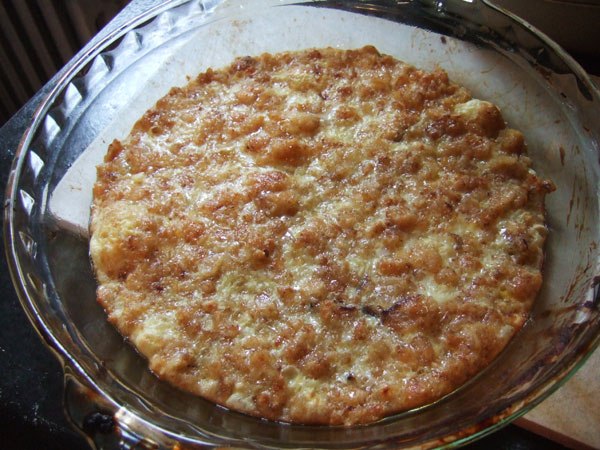
I initially made the cornbread according to the historic recipe; it was very dry, grainy, and crumbly.  Not pleasant. I prefer a cakier, modern cornbread.  So I retronovated: I grabbed my favorite contemporary cornbread recipe (Mark Bittman’s) and folded in about a cup of chopped apples at the end.

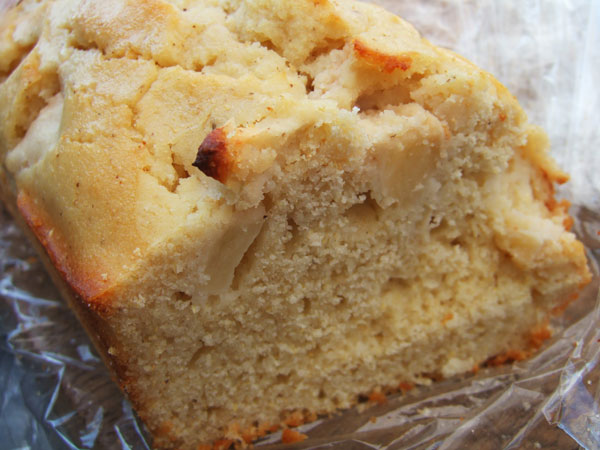
A cross section of cornbread and apples.

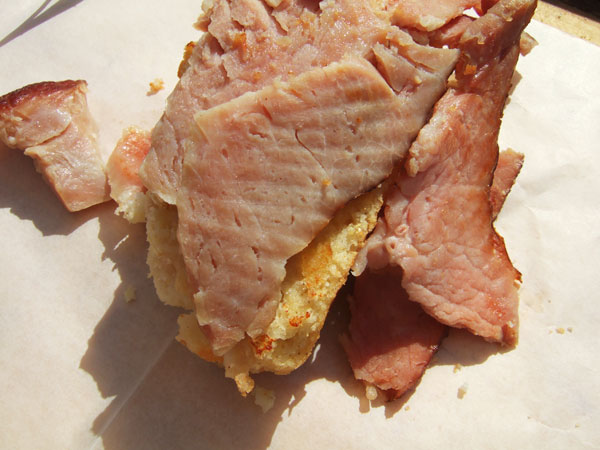
Cornbread and ham were common foods served at fairs and political rallies in the 19th century, so it only made sense to pair my apple cornbread with a thick slice of ham.  At the baseball game, I toasted the cornbread on a griddle and heated a slice of ham alongside.  The cornbread got a healthy smear of fresh, handmade, sooo-yellow butter I got at Saxelby’s Cheese in the Essex Street Market.  Seriously, one forgets how yellow fresh butter is.

Anyway: cornbread, butter, and hot ham on top.  It was a damn good sandwich.