Origin of a Dish: Chocolate Chip Cookies

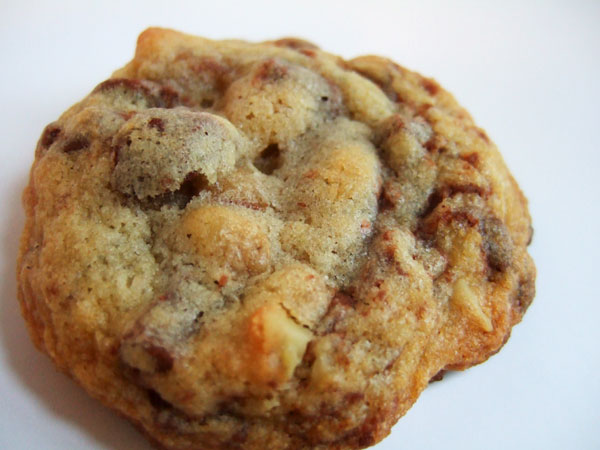
A chocolate chip cookie, baked from the original recipe.

During my recent experiments with chocolate, I got curious about the origins of the ultimate American chocolate dessert:  The Chocolate Chip Cookie.  Keep reading for the original recipe, which, in my opinion, is the perfect cookie.

Ruth Wakefield  is credited for the invention of the chocolate chip cookie at her Toll House Restaurant Whitman, Mass., “…a very popular restaurant that featured home cooking in the 1930s. The restaurant’s popularity was not just due to its home-cooked style meals; her policy was to give diners a whole extra helping of their entrées to take home with them and a serving of her homemade cookies for dessert.” (wikipedia)

The legend of the cookie’s creation goes like this: “Wakefield is said to have been making chocolate cookies and on running out of regular baker’s chocolate, substituted broken pieces of semi-sweet chocolate from Nestlé thinking that it would melt and mix into the batter. (wikipedia)”  I don’t believe this explanation.  Baker’s chocolate doesn’t magically melt into cookie dough, so if Wakefield knew how to work with baker’s chocolate, she would know that a semi-sweet Nestle bar would behave the same way. The legend makes her seem like a foolish little lady that made a silly mistake that magically turned into something wonderful.  I think she was actually an extremely talented cook with a brilliant idea.

Whatever the truth is, she sold her idea to Nestlé in exchange for a lifetime supply of chocolate (or so the story goes; I think she was probablly a smarter business woman than that).  Wakefield’s cookie recipe was subsequently printed on the back of all Nestle’s chocolate bars.  At first, Nestle included “a small chopping tool with the chocolate bars, but in 1939 they started selling the chocolate in chip (or morsel) form.” (wikipedia).

Chocolate chip cookies are The Official Cookie of the Commonwealth in Massachusetts: http://www.malegislature.gov/Laws/GeneralLaws/PartI/TitleI/Chapter2/Section42

Wakefield released a cookbook in 1936, Toll House Tried and True Recipes, which features the original chocolate chip cookie recipe as “Toll House Chocolate Crunch Cookies.”  The recipe, as well as the rest of the cookbook, can be found online here.  Below, here’s the same recipe from the April 26, 1940 Chicago Tribune (from the food timeline)

Here’s a new cookie that everybody loves because it is so delicious, so different and so easy to make. With each crisp bite you taste a delicious bit of Nestle’s Semi-Sweet Chocolate and a crunch of rich walnut meat. A perfect combination. Here’s a proven recipe that never fails. Try it tomorrow.
1 cup butter
3/4 cup brown sugar
3/4 cup granulated sugar
2 eggs, beaten whole
1 teaspoon soda
1 teaspoon hot water
2 1/4 cups flour
1 teaspoon salt
1 cup chopped nuts
2 Nestle’s Semi-Sweet Economy Bars (7 oz. ea.)
1 teaspoon vanilla
Important: Cut the Nestle’s Semi-Sweet in pieces the size of a pea. Cream butter and add sugars and beaten egg. Dissolve soda in the hot water and mix alternately with the flour sifted with the salt. Lastly add the cholled nuts and the pieces of semisweet chocolate. Flavor with the vanilla and drip half teaspoons on a greased cookie sheet. Bake 10 to 12 minutes in a 375 degree F. oven. Makes 100 cookies. Every one will be surprised and delighted to find that the chocolate does not melt. Insist on Nestle’s Semi-Sweet Chocolate in the yellow Wrap, there is no substitute. This unusual recipe and many others can be found in Mrs. Ruth Wakefield’s Cook Book–“Toll House Tried and True Recipes,” on sale at all book stores.”

A modernized version of this recipe can be found on the Nestle website, here.

The biggest problem in recreating the original recipe is the chocolate; I felt that chopping up a candy bar was an important part of the original process.  But nowadays, Nestle only makes semi-sweet morsels, not bars.  Nestle still makes milk chocolate bars, which I later found at Economy Candy, but for my first attempt at the recipe I had to use a stack of Hershey’s milk chocolate bars.

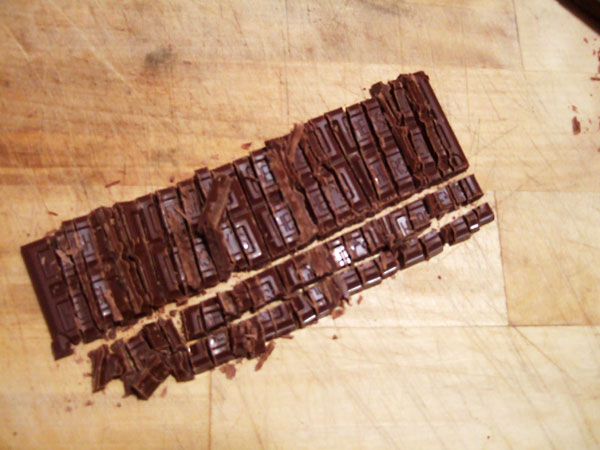
It was much easier to cut up the chocolate bar that I anticipated.  The recipe specified the pieces should be “the size of a pea,” and I tried to remain faithful to that.  I used a large knife and the job was done in short order and with little effort.  The chopped chocolate smelled seductive and got me thinking: why are we restricting ourselves to the bags of chocolate chips in the baking aisle, when there is a bevvy of delicious, interesting chocolate bars available?  Hachez, a German company, makes dark chocolate bars infused with orange, blackberry, mango/chili, and strawberry/pepper.  Mast Brothers Chocolate, in Brooklyn, features a variety of carefully crafted dark chocolate bars of single origin cocoa beans, as well as bars sprinkled with sea salt and ground coffee.  Put that in your cookie dough and bake it.

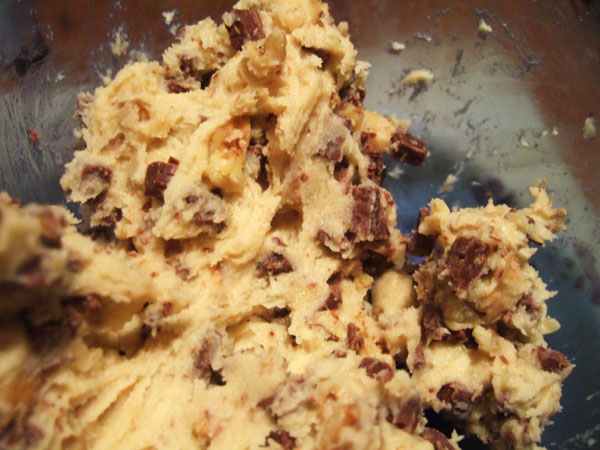
The dough mixed quickly and easily; it was baked and in my mouth in less than an hour.  The first bite of warm, melty cookie made me think of s’mores and brought back a flood of childhood memories.  The cookies were agreed to be perfect by all that sampled them: the best ratio of chocolate to nuts to everything in between.  Everyone was shocked to learn it was the first chocolate chip cookie recipe and wondered why it was ever changed.

For more on chocolate cookies, check out this recipe for one of the first known uses of chocolate in baking.
Events: Triangle Tea and Reception

I’m doing a FREE event at the Henry Street Settlement next week, Sunday the 20th at 3pm.  Historian Joyce Mendelsohn, author of The Lower East Side Remembered and Revisited, will give a talk about life on the Lower East Side in 1911 and the role settlement houses played in protecting the rights of new immigrants.  This event will honor the 100 year anniversary of the Triangle Shirtwaist Factory Fire, a disaster that devastated New York, but also brought about reform that created the modern workplace.

For my part, I’ll be creating refreshments appropriate to 1911 from the Settlement Cookbook; stop by to enjoy 1911 brownies with coffee frosting; lemon and nutmeg bundt kuchen; cheese and anchovy sandwiches; and Settlement deviled eggs.

Further details can be found here. Space for the tea and reception is limited and reservations are required. To reserve, please go here.

UPDATE: Apparently, the event is already filled!!

Snapshot: Maple Sugaring

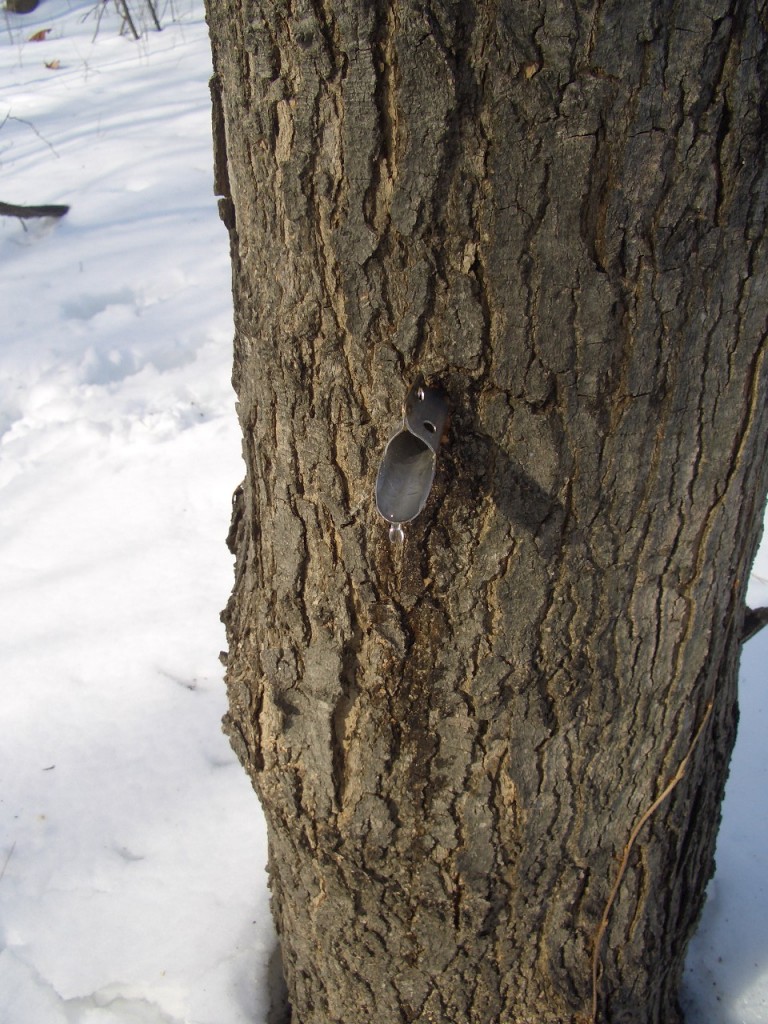
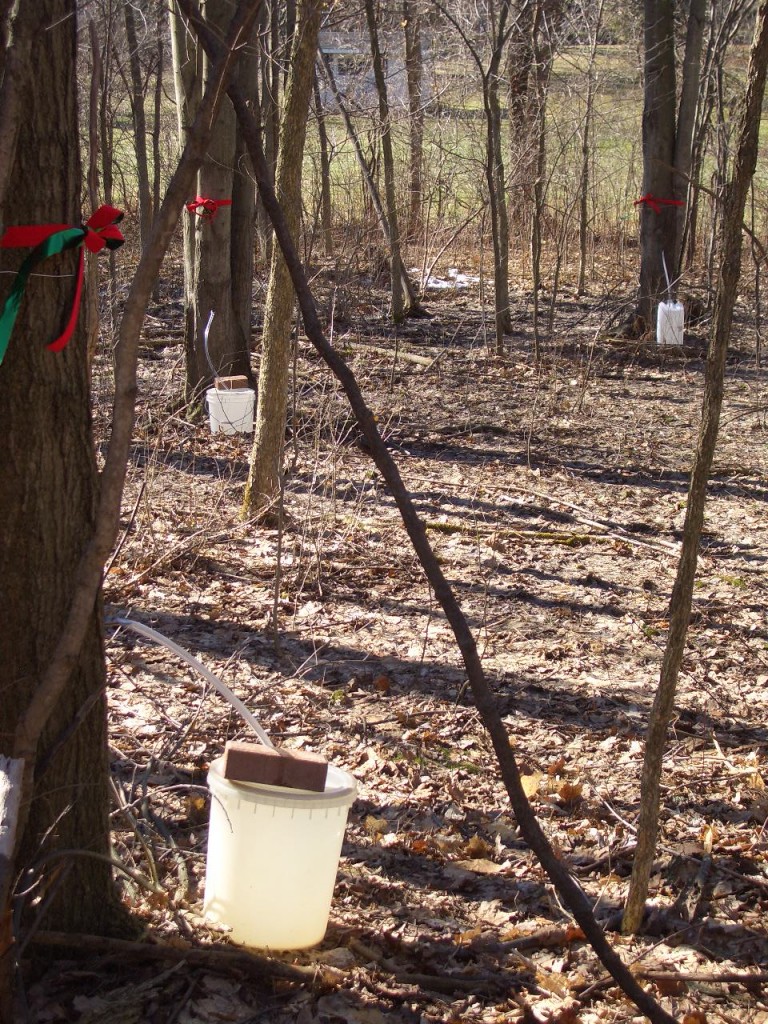
My parents are being super adorables.  Inspired by last year’s Starting from Scratch challenge, they got interested in producing maple syrup from their four acre yard in Ohio.  Last fall, they marked the sugar maple trees  and this spring they tapped them!


My Mom has been sending me email updates on their progress and last weekend I went home to Cleveland and toured their taps.  I also got to taste a spoonful of the finished product: it is indescribably unbelievable.  It tastes shockingly different from store bought “real” maple syrup, although we don’t know why.  The flavor is like sweet butter.  Sooo buttery.  Un. Believable.

It won’t be a bumper year for syrup, since they are still learning the ins and outs of production.  But perhaps next year we’ll be selling super-premium FPF brand maple syrup…

Until then, check out photos of their progress below.  Also, the intrepid pioneers at Starting from Scratch are gearing up for another challenge: A culinary endurance match, living only off foods they hunt, farm, fish, and forage.  Follow along here as they spend the next year getting prepared!

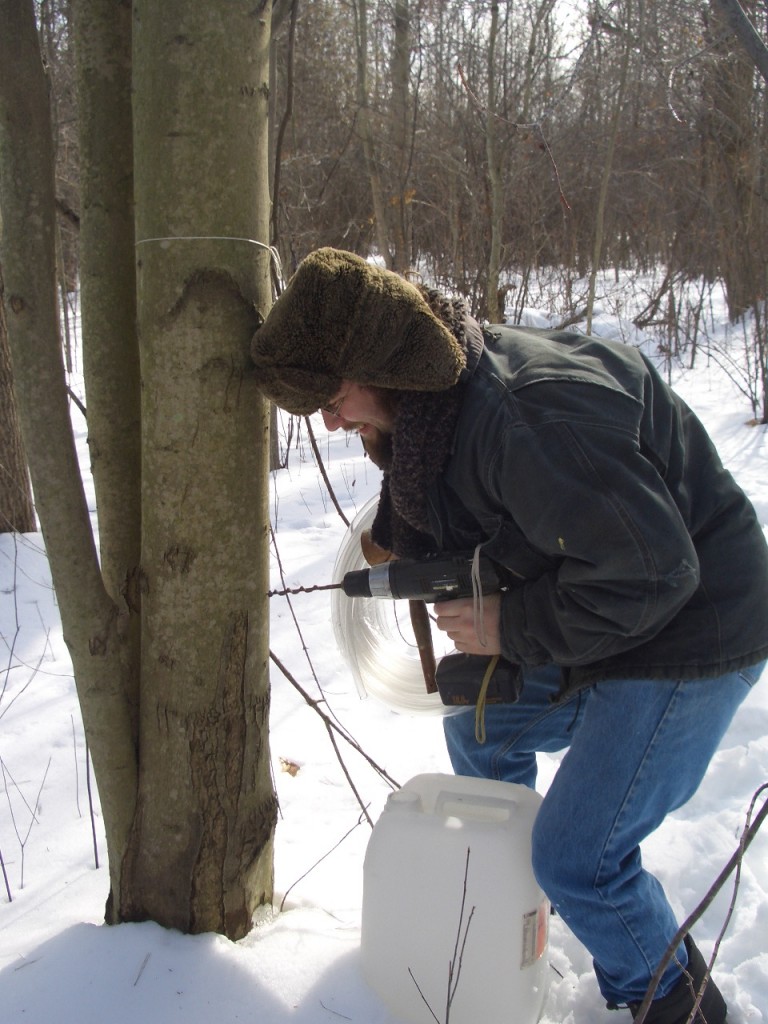
Family Friend Mark taps the trees.


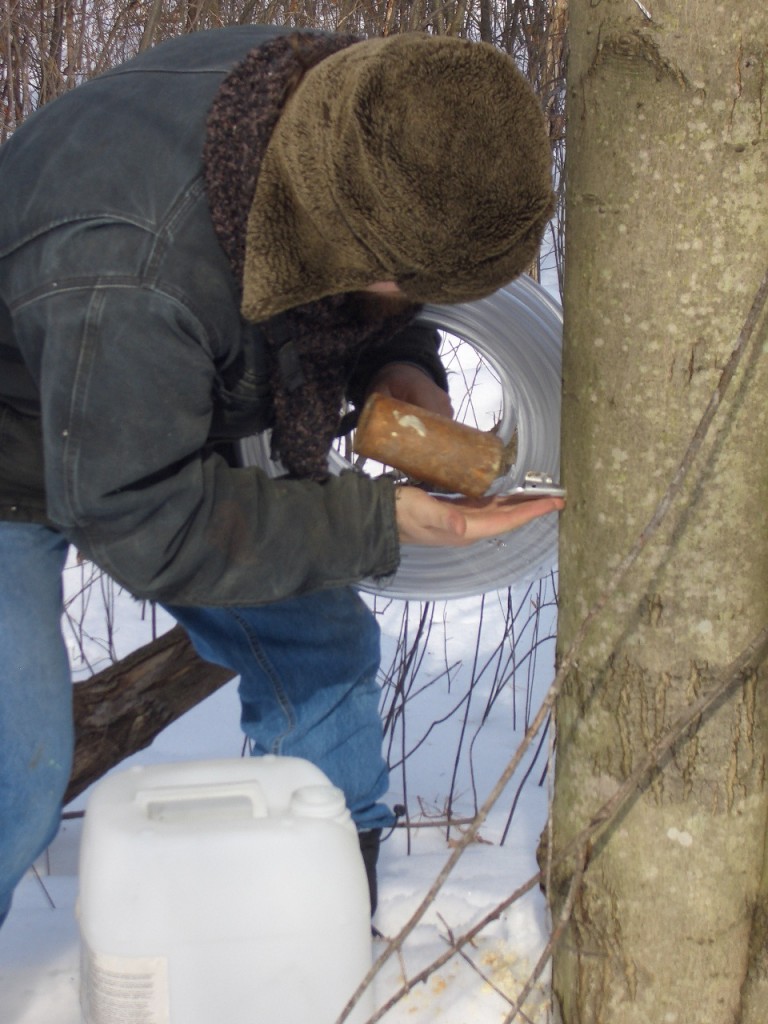
Mark hammers in the tap.


Holy Shit Moment: Sap actually comes out of the tree!


The Sugar Bush: Twelve trees tapped in total.

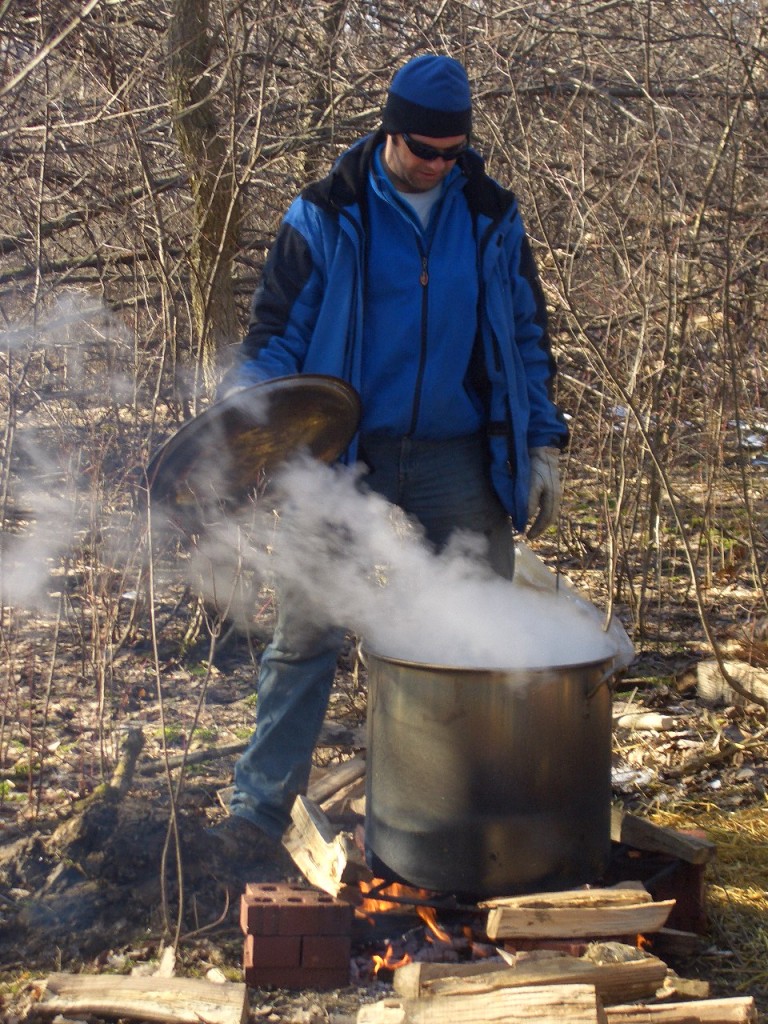
The First Boil: 40 gallons of sap = one gallon of syrup. The syrup was boiled two ways, on an outdoor stove (which yielded a smoky syrup liked by some and not by others) and inside, on the stove top. Todd checks the sap to see how it’s doing.

Results of the first boil: 1/2 cup of golden, high-grade, buttery maple syrup.

A Week of Chocolate Delights

I have an excess of chocolate.  Chips. Chunks. Powders.  It’s wedged in my cabinets: leftovers from other projects, donations from other kitchens.  It needs to be taken care of.  So, this being the time of year when we like to eat chocolate things and make kissy faces at each other (or sit at home gorging on chocolate and weeping), for the next week leading up to Valentine’s, I’ll be making all things chocolate.

Come along with me.

The History Dish: Chestnut Ice Cream

Right: Rachel Wharton and I chowed down on some melty, chestnut ice cream.

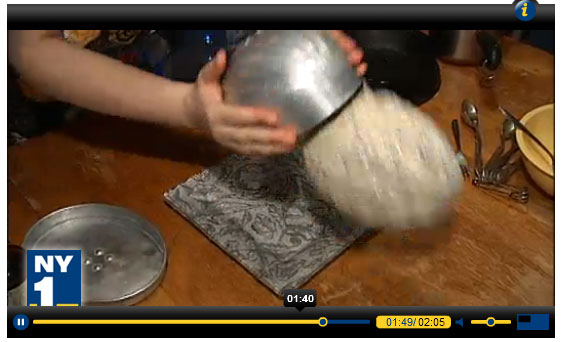
Coupla weeks ago, I was featured on New York 1 making some chestnut ice cream for Edible Manhattan editor Rachel Wharton.

The idea for the recipe came from Society as I have Found It, a book written by Ward McAllister in the 1890s.  He was a New Yorker, and a well-known socialite.  The book is about his fabulous life, and he dishes out all kinds of advice, like how to throw the best dinner party:

“In planning a dinner, the question is not to whom you owe dinners, but who is most desirable. The success of the dinner depends as much upon the company as the cook. Discordant elements — people invited alphabetically or to pay off debts — are fatal.

The next step is an interview with your chef, if you have one… whom you must arouse to fever heat by working on his ambition and vanity. You must impress upon him that this particular dinner will give him fame and lead to fortune. “

Sound advice, no?  The full chapter is here.

I’d like to throw a dinner party based on his suggested menu; it’s perfect for the winter and classically late 19th-century: it consists of Turtle Soup, Terrapin, Ham Mousse, Roast Turkey, Sweetbreads, Pate in Aspic and Canvasback Ducks.   The dessert, Nesselrode Pudding, is an ice cream made with chestnut puree.

The recipe requires a lot of steps, but every one is worth it.  The result is an incredibly creamy, flavorful ice cream.

***
Nesselrode Pudding (Chestnut Ice Cream)
Adapted from The American Heritage Cookbook and
Miss Corson’s Pratical American Cookery by Juliet Corson,  1886.

1 pint (2 cups) half and half
4 egg yolks
1 1/2 cups sugar
20 chestnuts, cooked and unshelled*
1 1/2 cups water
1/2 teaspoon vanilla extract
1/4 cup Maraschino Liquor, rum, or pineapple juice
1/2 cup currents
1/2 cup raisins
3/4 cup heavy whipping cream

*You can find chestnuts canned, perhaps in the import aisle of your grocery store.  I found a bag of “snacking” chestnuts that were roasted, unshelled and vacuum sealed.  Perfect.

1. Soak raisins and currents in a bowl with the Maraschino.  Set aside.

2. Beat egg yolks with 1/2 cup sugar.  Scald the half and half, then add it SLOWLY to the egg yolk mixture, whisking constantly.  Pour into a pan and cook on over a very low heat, stirring constantly, until the custard is thick enough to coat the back of a spoon.  Remove from heat.

3. Meanwhile, make the chestnut puree: add chestnuts, 1/2 cup sugar, water, and vanilla to a food processor.  Puree until smooth, then add to the custard.

4. Add custard mixture to the bowl of an ice cream mixture.  Allow to freeze to a soft-serve consistency.

5. Meanwhile, beat heavy cream and remaining 1/2 cup sugar with an electric mixer until stiff.  When custard has frozen soft, fold in whipped cream and fruit.

6. Pack into an ice cream mold  and place in the freezer overnight, or until frozen hard.

***

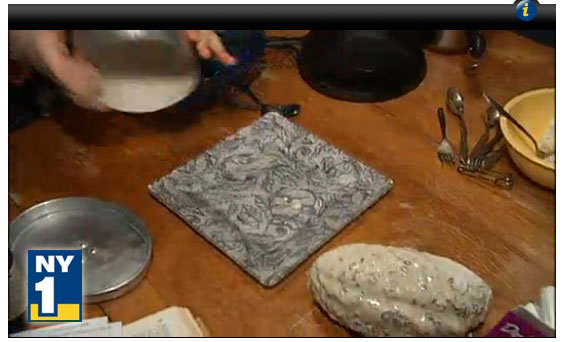
I let the ice cream set in the freezer overnight; while shooting for NY1, I busted it out all professional like “Oh, and we have one that’s already done!”  It was now time to unmold it: I dipped the outside of the mould into hot water until the outer layer of ice cream melted, then gently turned it upside down on a decorative platter. Simple, right?

Not for me. While decanting my ice cream, I managed to fling it across the table, where it collapsed into a sad heap.  See it all happen here.

Rachel and I managed to scoop the ice cream off of the table and make it presentable, although it totally looked like a brain.  Then we gave it the old taste test: although I was repulsed by the texture of the raisins, Rachel and I both agreed this ice cream was delicious.  On camera, we took dainty spoonfuls.  Off camera, we were shoveling it into our mouth.  The ice cream was so creamy and perfectly sweet; the chestnut flavor was interesting, delicious, and subtle.

Rachel suggested leaving out the fruit in the next batch and molding the ice cream in individual dishes with a single, candied chestnut to garnish the top.  I agree.  Hanging out with Rachel is always a treat.

What Would You Like to Learn?

I’ve been invited to teach a three-part course at the Brooklyn Brainery, an amazing non-profit that offers classes for cheap.  They’ve had educational sessions on everything from beekeeping to kimchi making to whiskey tasting to knife skills.

So I’d like to put the question to you: If I were to teach a course based on the contents of this blog, what would you be curious to learn more about?

Beaver Bonanza Part III: Beaver Three Ways

Carving the beaver tenderloin roast.

One of the requirements of my Alaskan Culinary Challenge is to serve the beaver meat to at least one other person.  So I put out an APB on Facebook to see who might be interested in trying some beaver; I ended up with a party of eight willing participants at my house.

I decided to test three different recipes for beaver.

Beaver Tenderloin Roast

I wanted to cook one portion of beaver with very little seasoning, so we could really taste the beaver flavor.  I had one packet of meat labeled “beaver tenderloin,” so I decided this most tender cut of meat would get the simplest treatment.  The tenderloin was cut into several smaller slices, so I decided to tie them into a little 1-pound roast with a bit of kitchen twine.  Thomas De Voe did say beaver was best roasted.

I seasoned the roast with some fresh ground pepper and kosher salt.  I heated a cast iron skillet with some clarified butter until the surface was smoking.  Then I placed the roast in the skillet and slid the whole thing into a preheated, 500 degree oven.  I let it roast 8 minutes, then pulled it out and let the meat rest 10 minutes, covered with tented aluminum foil.  Then I carved it into tasting portions and delivered it to my eagerly awaiting guests.

There was a tentative moment of silence as my guests each had a slice of beaver perched on their forks, ready to thrust it into their mouths.  We took a deep breath, then took the plunge: It was delicious!  The meat was quickly devoured.  It was not as gamey as anticipated, but definitely had a tang to it.  We were not horrified by our first taste of beaver.  But it wasn’t nearly as delicious as…

Searing the soy & garlic beaver.

Beaver in a Soy and Garlic Marinade

I adapted this recipe from an MFK Fisher recipe for steak; I think she would appreciate my resourcefulness.  It is the best marinade for beef I had ever tasted, so I decided to try it on beaver.

To make the marinade:

1/2 cup soy sauce
1/2 cup olive oil
6 cloves garlic

Rinse the meat and pat it dry, then put it in a Ziploc bag with the marinade. I let it sit six hours, turning the bag over every hour or so.  I heated a cast iron skillet with clarified butter until smoking, then added the meat to the sizzling skillet.  I browned the beaver two minutes on each side, then put the skillet into a preheated, 500 degree oven.  I gave it five minutes in the oven, then pulled it out and let it rest for ten minutes.  This gave me meat the was well done on the edges, and medium to medium-rare in the middle.

I had been worried that the soy and garlic would overpower the natural beaver flavor. If I’m going to eat an exotic meat, I don’t want to disguise the taste.  But in reality, it complimented the taste of the beaver and teased out its gaminess.  I think it’s a preparation worth trying on most wild meats, and some declared this recipe their favorite of the evening.  But it wasn’t as popular as…

Beaver, cooked slow.

Slow-Cooked Pulled Beaver

When the French Culinary Institute prepared their beaver meat, they sous vide it: a process by which you vacuum seal food in a plastic bag, then cook it at a very low temperature for a very long time–sometimes over the course of several days.  This technique not only produces tender meat, but is prized for creating perfectly creamy soft-cooked eggs.  But I don’t have a sous vide.  I have the everyday kitchen equivalent: a crock-pot slow-cooker.

FCI also got good results by brining their meat first.  So I created a brine for my beaver.

For the brine:

1 cup white vinegar
2 heaping tablespoons kosher salt

Put this in a Ziploc bag with the beaver meat and let brine for at least two hours, and up to six, turning every 30 minutes.  Remove the meat, rinse it, and pat it dry with paper towels.  The exterior will have turned a grayish color.

Then, to a slow cooker, add:

1 large can crushed, diced, or whole tomatoes in their juice (I used a bag of flash frozen plum tomatoes from my local CSA)
2 cups stock (beef, chicken, homemade–it doesn’t matter)
Seasoning.  I seasoned conservatively at first, not wanting to mar the beaver flavor.  But beaver seems to be one of those meats that can stand up to a lot of heavy seasoning.  I used about a teaspoon of “Pasta Sprinkle,” a spice mix from Penzey’s that contains basil, oregano, thyme and garlic; and a couple hearty shakes of Red Pepper Flakes.

I cooked the meat on high for 4 1/2 hours; but if you have the time, cook it on the low setting for 8 hours.  When it was done, it was tender enough to pull apart with a fork; I mixed it with the sauce and served a few tender morsels to my friends.

It. Was. Amazing.  Still gamey, and sooo tender.  My guests immediately grabbed slices of buttered potato bread and made little pulled beaver sandwiches.  The sweetness of the bread mixed with the richness of the meat was the perfect combination.  The brine had made the meat incredibly tender, while the acid of the tomatoes broke down the meat’s wild flavor just enough.

This recipe gets four stars from me.  It’s impossible to mess up and it delivers perfect, delicious meat.

***

So what does beaver taste like? Beef, but more flavorful.  Robust, but less gamey than venison.  More mild than a dark-meated poultry.  A red meat with a perfect tanginess and richness.  And you don’t have to take it from me: everyone who came to my beaver party left satisfied, not horrified, and would willingly eat beaver again any day.