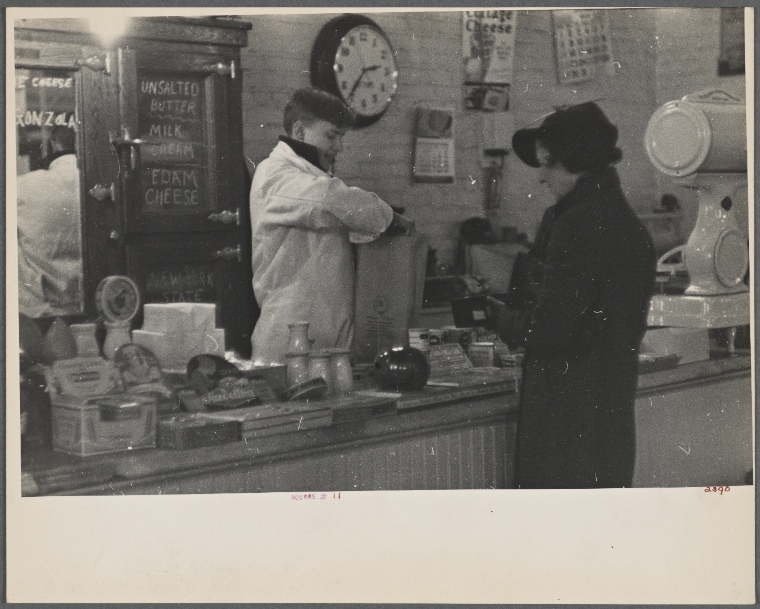
From the Piggly Wiggly to King Kullen: How We Got to Grocery Shop

Interior of a grocery store, 1936. Source: The New York Public Library.

We’ve got one more guest post this week from Carly Robins, an actress, writer, producer, and voice over artist. She is also a lover of food and creator of  Grocery Tales (coming soon to a TV near you).

I love grocery shopping! There. I said it! What most people think of as a chore, I relish. Even when I travel, I love to stop at the local grocery store because I find it is the only way to truly feel and understand the local culture.

Dutch Grocery on Broad St., 1859. NYPL.

Many years ago when my husband and I were in Laos we had the most amazing crème brulee with this sugared topping that I had never tasted before. I couldn’t stop dreaming about it all night and the following day, through lots of hand gestures and pointing to the menu, the waiter came back with a package, written in Thai, and gave us directions to the local grocery store. I discovered it was coconut palm sugar, and I was mesmerized by it. This experience confirmed not only my obsession with grocery stores, but where our food comes from, what foods we are exposed to, and how the grocery store experience has evolved.

In 1859, George Huntington Hartford and George Gilman founded The Great American Tea Company, which later became Great Atlantic & Pacific Tea Company or A&P. It was a storefront on Vesey Street in New York City that also had a mail order business. In the beginning, they sold mostly coffee, tea, spices and other dry goods. However, by the 1880s, they were operating a hundred stores across the USA,becoming the first grocery store chain. They stocked their shelves with the help of their own invention, the first refrigerated rail cars.
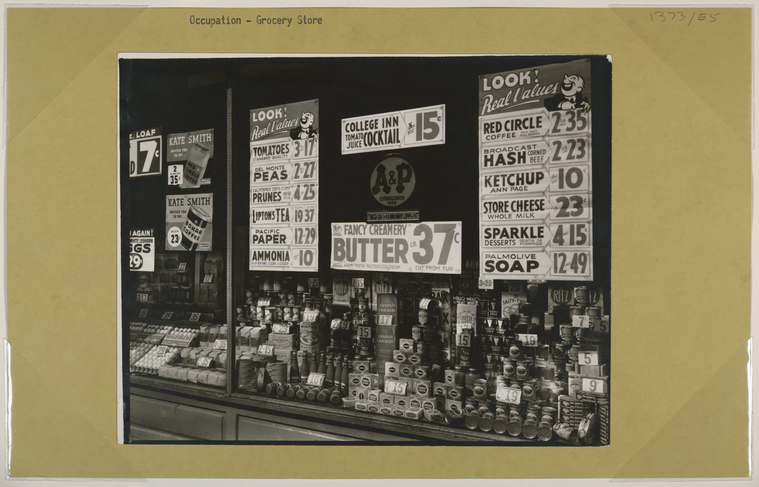
A&P, 1936. Source: New York Public Library.

The next big advancement came when Clarence Saunders invented the first ever “self-service” grocery store in 1916, and called it The Piggly Wiggly.  Saunders noticed how much time and money was wasted by having clerks wait on each customer individually, fill orders, and often deliver groceries to the customer’s home. The Piggly Wiggly allowed customers to self-select the items they would like to purchase and then, in what was also a new innovation, have a cashier ring them up. These items were individually price-marked and displayed into categories, birthing the need for branding and packaging to grab the attention of the shopper.

These stores were hugely successful and franchises were sold nationwide to hundreds of grocery retailers. In the 1920’s and 1930’s, an explosion of family chain stores like Ralph’s, Safeway, and Kroger opened, mimicking the Piggly Wiggly model. There were all kinds of buying and selling and merging of stores, along with anti-trust problems and other legal battles, that made for a little bit of chaos, but there were also opportunities for great wealth. Within this explosion, stores started including different sections such as dairy, meat, and produce, offering their patrons the convenience of going to one store for all their shopping needs. A juicy little tidbit: Saunders, the Piggly Wiggly founder, eventually ran into some financial trouble trying to manipulate stock prices and lost control of his company. Is that an American story or what?
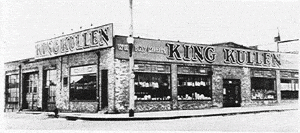
The next innovation came from a former employee of a Kroger Grocery Store: Michael Cullen opened his first King Kullen Grocery in Queens, August of 1930. His business model focused on high volume at low profit margins. It was a smashing success; specialty groceries couldn’t compete with massive stores, large volume, and low low pricing. And according to the Smithsonian Institute, King Kullen is considered America’s first ‘supermarket’.

Living in New York City affords me the luxury of many grocery stores, whether specialty or otherwise. Just like on that trip to Laos, my eyes are now open to the global possibilities that ingredients provide and how we can incorporate those ingredients into our daily lives. It’s all about the ingredients and where to find them! Speaking of, I have a fantastic Gluten Free Banana Bread that is moist and delicious. I am able to buy most of the ingredients at one of my favorite specialty stores, Sahadi’s Importing Company. It’s a Middle Eastern grocery store founded in 1898 in Manhattan until it got displaced because of construction for the Brooklyn Battery Tunnel. Sahadi’s is now located on Atlantic Avenue in Brooklyn Heights and is known for their bulk section options, including various alternative flours.

Gluten Free Banana Bread

½ Cup Dark Chocolate Chips
2 Eggs
2 ripe Bananas, mashed
1/2 cup Coconut Nectar
1/2 Stick or Less of Butter
1 tsp. Real Vanilla Extract
3/4 cup Brown Rice Flour
1/4 cup Coconut Flour
1/4 cup Almond Flour
1 tsp. Baking Soda
1/3 cup Melted Coconut Oil

  1. Preheat oven to 350. Line a bread loaf pan with parchment paper over sides to easily lift and add the chocolate chips to the bottom of the pan. (You can always incorporate the chocolate chips into the batter after all ingredients have been combined BUT…chocolate chips that have been melted and baked at the bottom of the pan are a delight to behold. I learned this trick because apparently my mother in-law, who had a lot of tasty cooking accidents, did this in error while cooking a bundt cake and my husband swears it was the best thing he has ever eaten. It also allows you to use less chocolate if you want since it is concentrated in one area only. You can use this method on any sweet bread.)
  2. In a mixing bowl, beat eggs lightly. Add mashed bananas, butter, nectar and vanilla and mix thoroughly.
  3. Add melted coconut oil, then add Rice flour, Coconut flour, Almond Flour, baking soda. Mix until all ingredients are moist.
  4. Pour batter into loaf pan. Bake for 45 – 55 minutes or until bread is no longer wet in the middle.
Event: Masters of Social Gastronomy and the Rise of Chocolate

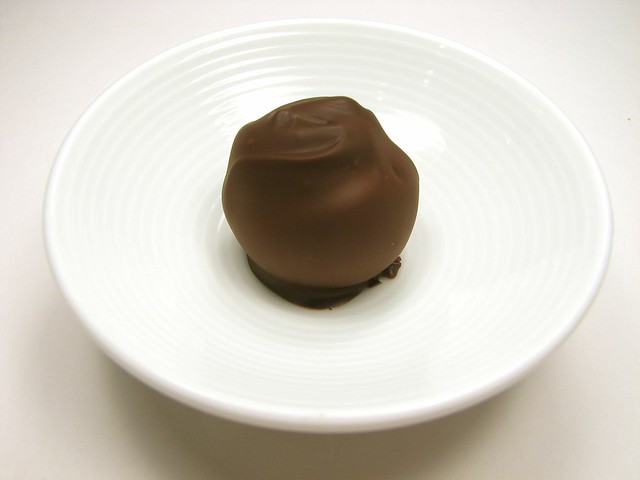
Chocolate by Windell Oskay

MSG PRESENTS The Rise of Chocolate: The Heated History of the World’s #1 Candy

Tuesday, March 25th
FREE
Doors @ 7:30
Littlefield, Gowanus, Brooklyn
RSVP PLZ
This month MSG tackles the world’s most popular candy: chocolate!
We’ll track the history of chocolate from its roots as an ancient Mesoamerican beverage to its current world-championship status. You’ll learn how a yellow, football-shaped tropical fruit transforms into something Whole Foods can charge you $10 for, and what “Mexican Hot Chocolate” actually has in common with what Montezuma drank.
Peek at Europe’s decades-long war about British chocolate and uncover why the whole continent seems to have it out for its American counterpart. Burning questions of modern confectionery will be answered: What’s better, milk or dark? Why does Hershey’s have its own theme park? Do M&M’s actually melt in your hand?
And of course, it wouldn’t be spring without a discussion of Easter candy, including everyone’s favorite, the Cadbury Mini Egg. In fact, I may have just purchased $50 in mini eggs to share at the event…RSVP HERE!

Etsy Kitchen Histories: Ancient Hot Chocolate

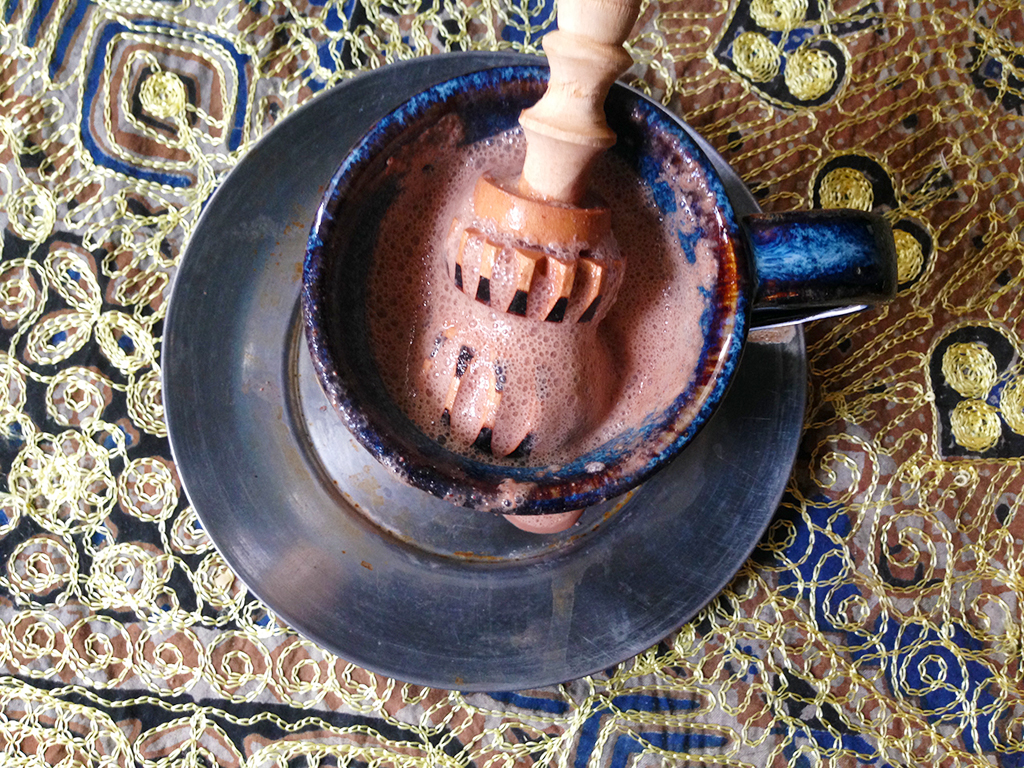
chocolate3Hot chocolate, frothed with a molnillo.

In my latest post for Etsy, I experiment with making hot chocolate–Ancient Mesoamerican style:

In both Maya and Aztec art there are depictions of elegant women pouring liquid chocolate between two vessels: one on the ground and one held at chest height. Pouring the chocolate back and forth aerates and froths the drink as it falls through space, like the waterfall in Willy Wonka’s chocolate factory. A thick head of froth was seen as the sign of a fine cup of chocolate. The method seemed simple enough, so I placed one bowl on the kitchen tile, held one in the air, and gently poured. Chocolate spattered all over my floor.

Despite my best efforts, my chocolate wouldn’t froth. I found the answer to my problem in Mary Roach’s new book  Gulp: Adventures on the Alimentary Canal, all about the science of eating (it’s great!). In a footnote about spit bubbles, she explains froth is caused by proteins, which hold air into a liquid when beaten, like whipping cream or making meringue. Cacao has a little bit of protein, but apparently not enough to create a foamy head. The Mexican Cook Book Devoted to the American Homes,  written in 1947  by a Mexican woman, suggests adding eggs into the cacao mixture–for the express purpose of frothing:

Almonds are usually added to the home-made chocolate, as they give it a very good taste, and also boiled egg yolks, these with the primary purpose of having the chocolate froth up upon being boiled.

I didn’t try hard boiled eggs as she suggested, but I did add a raw egg white, and the concoction foamed easily. The 1947 book is a blend of pre- and post- Colombian chocolate making techniques; and while eggs were available to the Maya and Aztec (from wild birds (updated: or turkeys or Muscovy ducks)) I can’t say if they would have been used in chocolate making.

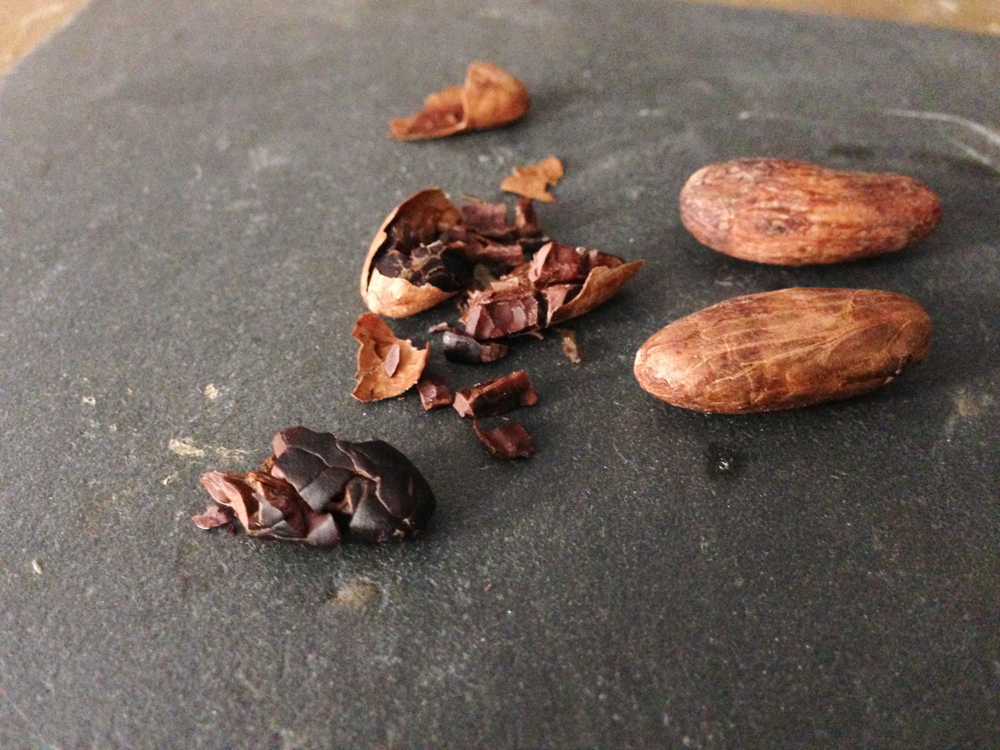
cacao2A cacao bean with the nibs inside.

The entire recipe is below, and it gives an interesting look into the process of making chocolate. You can read more about my chocolate making experiences on Etsy!

***

Old Fashioned Chocolate a la Mexicana
From Mexican Cook Book Devoted to the American Homes, 1947
By Josefina Valazquez de Leon

1 1/2 pounds of Tabasco cocoa (a regional Mexican cacao)
10 ounces Maracaibo cocoa (Venezuelan cacao)
2 pounds of sugar.
4 ounces of almonds.
1/2 ounce cinnamon.
2 boiled egg yolks

Have the cocoa roasted in a frying pan as much at to suit your taste (some persons like it dark and others light). Once roasted let it cool down take the shell off to better it so there be no shell left on it. (This shell is saved to make refreshments, gruel and “champurrado“). In special metate for grinding the cocoa, the sugar is first ground together with the almonds (these latter slightly roasted and ground shell and all), adding also the egg yolks. After all this has been well ground is placed aside and fire put under the metate grinding the cocoa next, once roasted, of course. When it is well reground the sugar and the other ingredients are added and is again ground over until all of it is well mixed and formed into a paste which does not stick to the metate. Then one proceed to mould it…The paste is then poured on the moulds and pressed and rubbed with the hand so as to make it adquire (sic) a shining surface and immediately is marked with a knife in order to divide each mould contents into sixteen equal parts each of these parts being in turn equal to one ounce.

Origin of a Dish: Chocolate Ice Cream

Ice cream made with 18th century chocolate!

There are only a few more official days of summer left, so I’m going to use them to their best advantage by devouring as much ice cream as possible.   But chocolate or vanilla?  A very important question.  According to the International Ice Cream Association, 30% of ice cream eaters prefer vanilla, while a mere 10% prefer chocolate.

But more important important to me is the question: which flavor came first, chocolate or vanilla?

Some of the earliest frozen desserts were scoops of snow or shaved ice topped with flavored sugar syrups;  sometimes, these were made into icy drinks.  In the Middle East they were known as sharbates or serbets–the origin of the words sorbet and sherbet.

Drinking Chocolate making tools: a pot and mixing device. From Lady Anne Fanshawe’s journal, c. 1665.

Because of the precedent of frozen drinks, some of the earliest ice cream flavors were drinks, like coffee and tea. Which is why chocolate ice cream was invented long before vanilla.   The first frozen chocolate recipe was published in Naples, Italy in 1692 in the book The Modern Steward.   “Chocolate” was popular hot drink in 17th century Europe, and was  commonly mixed with spices like cinnamon, chili peppers, anise, almonds or musk (glandular extracts from the musk deer (eww)).  Today’s “Mexican Chocolate”  is actually a descendant of how chocolate was served in the Spanish court, not how it was served by the ancient peoples of Mexico.

The Historic Division of Mars make a historic chocolate based of an authentic 18th century recipe.   It looks like a chocolate crayon, and is blended with anise, red pepper, nutmeg, orange zest, and cinnamon.

I decided to make a version of the original chocolate using a basic ice cream recipe and half a cup of grated historic chocolate.  Before the 19th century, ice cream was made using only cream, but I think that gives it a borderline buttery texture.  I like a 2:1 ratio of cream and whole milk.

As the cream and chocolate froze in my modern ice cream maker, the rotated action of the dasher release the oils of the ground spices, and made my kitchen extremely fragrant.  Homemade ice cream is supposed to freeze once in the ice cream maker, and then it should go into the freezer, to become hard-packed ice cream.

I stole my first taste of historic chocolate ice cream off the dasher as it came out of the ice cream maker:  it tasted just like a Mc Donald’s chocolate milkshake, which was super weird.  Or at least how I remember them tasting–I haven’t had one since middle school, when my mom would always buy me one as a treat after visits to the orthodontist.  I tasted the ice cream after it was fully frozen a few hours later: the chocolate wasn’t the prominent taste.  Instead, all the warm spices the chocolate was blended with where in the forefront.  Anise was the most pronounced, but without leaving a  liquorice aftertaste.

If you’re interesting in trying this recipe out, you can buy historic chocolate here.  It’s also great hot with lots of cream and sugar.

Next up: Vanilla!  How America’s favorite ice cream came to be.

***
 
Much of the research for this article came from Of Sugar and Snow: A History of Ice Cream Making.  Learn more about this book here!  For a history of drinking chocolate, check out A History of the World in Six Glasses here.


Origin of a Dish: The Ice Cream Cone

Waffle Cone?

I had some custard left over from demoing ice cream making at the Brooklyn Brainery over Labor Day weekend, so I decided to toss it in my ice cream maker and enjoy a little made-from-scratch ice cream at home.  Plus, I wanted to try out these neat tip I learned during class:  I team-taught my session with Soma, one of the founders of the Brainery.  At the end of the class, students could pitch their dream ice cream flavors, and Soma would explain how to make them by using different techniques to incorporate flavors.  To add a “swirl,” like chocolate,  you take the ice cream out of the ice cream maker and you layer it in a Tupperware  much like a parfait:

How to make a chocolate swirl.

Then you put it in the freezer.  When you scoop it, it comes out like a chocolate swirl. I layered my vanilla bean ice cream with U-Bet Chocolate Syrup.

For my class, I did a lot of research on the history of ice cream in America.  I got really curious about the origin of the ice cream cone when I stumbled across this article from Saudi Aramco World: Zalabia and the First Ice Cream Cone.  SAW is a cool publication from which I’ve previously cooked some medieval Middle Eastern recipes.

The idea of an ice cream cone has been around for a few hundred years–they were known as “cornets” in Europe.  But as far as modern American cones, SAW recounts and ice cream cone legend I have heard before:

The Louisiana Purchase Exposition, also called the 1904 World’s Fair, was the largest the US had seen since the 1893 Columbian Exposition in Chicago. It covered some 500 hectares (1235 ac) and showed off such inventions as the year-old airplane, the radio, the telephone switchboard and the silent movie… (There were also less memorable attractions, among them a butter sculpture of President Theodore Roosevelt and a bear made out of prunes.) With more than 18 million visitors passing through the Exposition over its seven-month run, there were also scores of vendors offering much to eat.

(Ernest) Hamwi and his wife, the story goes, took their meager life’s savings and invested them in a zalabia booth, joining other like-minded immigrants from the Levant in attempting to transplant to the US the crisp, round, cookie-like snack so popular back home. Each zalabia was baked between two iron platens about the size of a dinner plate, hinged together and held by a handle over a charcoal fire. They were served sprinkled with sugar. The Hamwis wound up doing their cooking next to one of the approximately 50 ice-cream stands dotted around the fair, though exactly who owned the stand is in some doubt: It was either Arnold Fornachou or Charles Menches. Whoever it was, his ice cream sold faster than Hamwi’s zalabia—so fast, in fact, that one day he ran out of clean glass cups. At this moment, some say, the ice-cream man saw the possibilities of the zalabia; others claim the zalabia man saw the possibilities of the ice cream.

It’s Hamwi himself who originated this story, in an ice cream trade journal, and is generally credited with inventing the ice cream cone.   However, his story has never been proven, nor has there been any evidence found that he had a booth at the fair at all.

But people do seem to think that the 1903 Exposition is the time and place that ice cream and cone met, and that the pizzelle-like zalabia had something to do with it.  I got curious to make a zalabia, which hail from Lebanon, Syria, Greece and Turkey.  However, when a scoured the internet for a recipe, all I could come up with were recipes for north-African zalabia, a yeast-risen, deep-fried dough with honey syrup.  Not the same.

I ended up trying out this Martha Stewart recipe for waffle cones, but being that I don’t have a pizzelle maker, I ended up making waffle cones.  The result was freaking delicious, but not what I had set out to do.

If anyone out there has a zalabia recipe, hit me up! In the meantime, read the rest of the fascinating Saudi Aramco World article here.

Origin of a Dish: Chocolate Chip Cookies

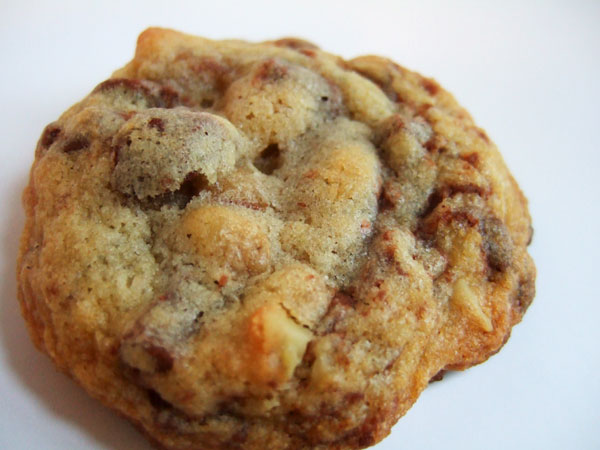
A chocolate chip cookie, baked from the original recipe.

During my recent experiments with chocolate, I got curious about the origins of the ultimate American chocolate dessert:  The Chocolate Chip Cookie.  Keep reading for the original recipe, which, in my opinion, is the perfect cookie.

Ruth Wakefield  is credited for the invention of the chocolate chip cookie at her Toll House Restaurant Whitman, Mass., “…a very popular restaurant that featured home cooking in the 1930s. The restaurant’s popularity was not just due to its home-cooked style meals; her policy was to give diners a whole extra helping of their entrées to take home with them and a serving of her homemade cookies for dessert.” (wikipedia)

The legend of the cookie’s creation goes like this: “Wakefield is said to have been making chocolate cookies and on running out of regular baker’s chocolate, substituted broken pieces of semi-sweet chocolate from Nestlé thinking that it would melt and mix into the batter. (wikipedia)”  I don’t believe this explanation.  Baker’s chocolate doesn’t magically melt into cookie dough, so if Wakefield knew how to work with baker’s chocolate, she would know that a semi-sweet Nestle bar would behave the same way. The legend makes her seem like a foolish little lady that made a silly mistake that magically turned into something wonderful.  I think she was actually an extremely talented cook with a brilliant idea.

Whatever the truth is, she sold her idea to Nestlé in exchange for a lifetime supply of chocolate (or so the story goes; I think she was probablly a smarter business woman than that).  Wakefield’s cookie recipe was subsequently printed on the back of all Nestle’s chocolate bars.  At first, Nestle included “a small chopping tool with the chocolate bars, but in 1939 they started selling the chocolate in chip (or morsel) form.” (wikipedia).

Chocolate chip cookies are The Official Cookie of the Commonwealth in Massachusetts: http://www.malegislature.gov/Laws/GeneralLaws/PartI/TitleI/Chapter2/Section42

Wakefield released a cookbook in 1936, Toll House Tried and True Recipes, which features the original chocolate chip cookie recipe as “Toll House Chocolate Crunch Cookies.”  The recipe, as well as the rest of the cookbook, can be found online here.  Below, here’s the same recipe from the April 26, 1940 Chicago Tribune (from the food timeline)

Here’s a new cookie that everybody loves because it is so delicious, so different and so easy to make. With each crisp bite you taste a delicious bit of Nestle’s Semi-Sweet Chocolate and a crunch of rich walnut meat. A perfect combination. Here’s a proven recipe that never fails. Try it tomorrow.
1 cup butter
3/4 cup brown sugar
3/4 cup granulated sugar
2 eggs, beaten whole
1 teaspoon soda
1 teaspoon hot water
2 1/4 cups flour
1 teaspoon salt
1 cup chopped nuts
2 Nestle’s Semi-Sweet Economy Bars (7 oz. ea.)
1 teaspoon vanilla
Important: Cut the Nestle’s Semi-Sweet in pieces the size of a pea. Cream butter and add sugars and beaten egg. Dissolve soda in the hot water and mix alternately with the flour sifted with the salt. Lastly add the cholled nuts and the pieces of semisweet chocolate. Flavor with the vanilla and drip half teaspoons on a greased cookie sheet. Bake 10 to 12 minutes in a 375 degree F. oven. Makes 100 cookies. Every one will be surprised and delighted to find that the chocolate does not melt. Insist on Nestle’s Semi-Sweet Chocolate in the yellow Wrap, there is no substitute. This unusual recipe and many others can be found in Mrs. Ruth Wakefield’s Cook Book–“Toll House Tried and True Recipes,” on sale at all book stores.”

A modernized version of this recipe can be found on the Nestle website, here.

The biggest problem in recreating the original recipe is the chocolate; I felt that chopping up a candy bar was an important part of the original process.  But nowadays, Nestle only makes semi-sweet morsels, not bars.  Nestle still makes milk chocolate bars, which I later found at Economy Candy, but for my first attempt at the recipe I had to use a stack of Hershey’s milk chocolate bars.

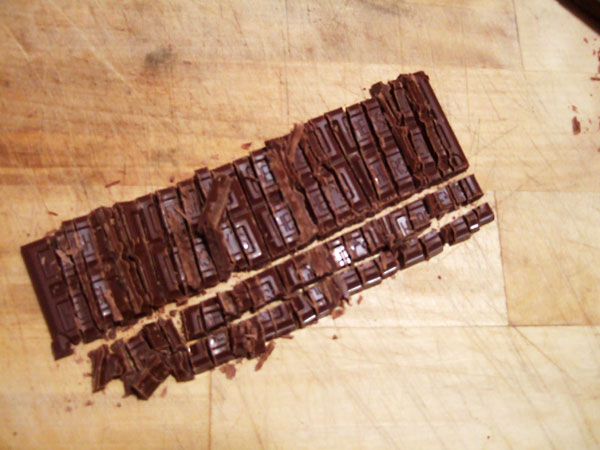
It was much easier to cut up the chocolate bar that I anticipated.  The recipe specified the pieces should be “the size of a pea,” and I tried to remain faithful to that.  I used a large knife and the job was done in short order and with little effort.  The chopped chocolate smelled seductive and got me thinking: why are we restricting ourselves to the bags of chocolate chips in the baking aisle, when there is a bevvy of delicious, interesting chocolate bars available?  Hachez, a German company, makes dark chocolate bars infused with orange, blackberry, mango/chili, and strawberry/pepper.  Mast Brothers Chocolate, in Brooklyn, features a variety of carefully crafted dark chocolate bars of single origin cocoa beans, as well as bars sprinkled with sea salt and ground coffee.  Put that in your cookie dough and bake it.

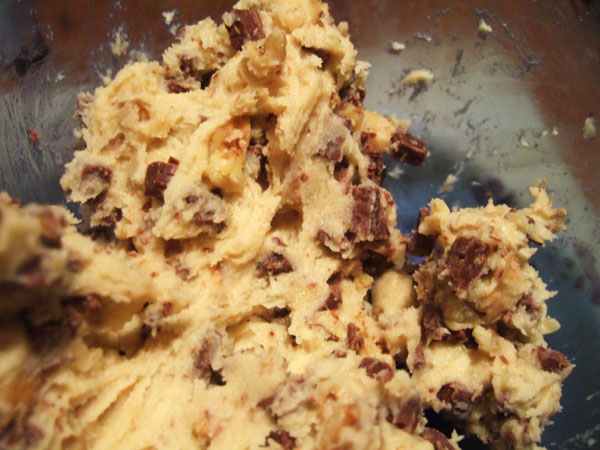
The dough mixed quickly and easily; it was baked and in my mouth in less than an hour.  The first bite of warm, melty cookie made me think of s’mores and brought back a flood of childhood memories.  The cookies were agreed to be perfect by all that sampled them: the best ratio of chocolate to nuts to everything in between.  Everyone was shocked to learn it was the first chocolate chip cookie recipe and wondered why it was ever changed.

For more on chocolate cookies, check out this recipe for one of the first known uses of chocolate in baking.

Chocolate Delight: Tunnel of Fudge Cake

Tunnel of Fudge cake bakes up tall, with a glossy, brownie-like crust.  Break pieces off and eat it; no one will know.

I’m wrapping up Chocolate Delight week with a bang: a cake that has a built-in Tunnel of Fudge.

The legend of this cake was related to me by Jessica, the author of Pictures of Cake.  This cake won second place at the 1966 Pillsbury Bake-off, losing to ‘”golden gate snack bread,”‘  a yeast bread made with instant flour, processed cheese spread, dry onion soup mix and butter.(source)”  Blech.  The snack bread has been long forgotten, while Tunnels of Fudge lives on.

The Tunnel of Fudge cake was a technical revolution: first, it produced a moist cake with a fudgy, uncooked center, perhaps the ancestor of the modern Molten Chocolate Cake.  Second, it used a Bundt pan.  For a little more information on that, take a look at Jessica’s invitation to her ToF Cake party:

Third, this cake is quite possible the least healthy thing I have ever made.  It contains approximately 60 eggs, 1 millions pounds of butter, and 20 cups of sugar.  Originally, it was made with a pre-packaged, powdered frosting mix called Double Dutch Fudge Buttercream.  

Tunnel of Fudge Cake(original recipe)
1 1/2 cups soft Land O’ Lakes Butter
6 eggs
1 1/2 cups sugar
2 cups Pillsbury’s Best Flour (Regular, Instant Blending or Self Rising*)
1 package Pillsbury Double Dutch Fudge Buttercream Frosting Mix
2 cups chopped Diamond Walnuts

Oven 350° [ed. 350 F / 175 C]
10-inch tube cake

Cream butter in large mixer bowl at high speed of mixer. Add eggs, one at a time, beating well after each. Gradually add sugar, continue creaming at high speed until light and fluffy. By hand, stir in flour, frosting mix, and walnuts until well blended. Pour batter into greased Bundt pan or 10-inch Angel Food tube pan. Bake at 350° for 60 to 65 minutes. Cool 2 hours, remove from pan. Cool completely before serving.

Note: Walnuts, Double Dutch Fudge Frosting Mix and butter are key to the success of this unusual recipe. Since cake has a soft fudgy interior, test for doneness after 60 minutes by observing dry, shiny brownie-type crust.

***

After the frosting mix was discontinued, Pillsbury developed a modern recipe which you can find here. This is the recipe I baked from, with a few minor changes that I will include below.

***
Tunnel of Fudge Cake, REMIXXXX

Adapted from Pillsbury.com and
The 17th Annual Pillsbury Busy Lady Bake-Off Cookbook, 1966

2 3/4 cups granulated sugar
1 3/4 cups  (2 and 3/4 sticks) butter, at room temperature
6 eggs
2 1/4 cups flour
3/4 cup unsweetened cocoa
1/4 tsp salt
2 cups chopped walnuts (the recipe notes that “Nuts are essential for the success of this recipe.” ha!)

1. Grease a bundt pan and dust with additional cocoa powder.  Preheat oven to 350 degrees.

2. In a large bowl, whisk together flour, cocoa powder, and salt.  Set aside.

3. Cream together sugar and butter until light and fluffy, about three minutes at medium speed.  Add eggs one at a time, mixing thoroughly after each one.

4. With mixer on low, slowly add dry ingredients.  Scrape bowl, then mix until combined.

5. With a spatula, fold in walnuts.  Spoon batter into bundt pan; bake 45 minutes or until top has a dry, shiny brownie-type crust.  Cool upright in pan on wire rack 1 1/2 hours. Invert onto serving plate; cool at least 2 hours.

***

Can someone please tell me how to get a cake out of a bundt pan?  Mine always comes out in broken, shameful pieces.

When I cut my cake, it wasn’t puking out fudge like in the 1966 photo; but, running down the middle was a dense spine of goopy fudgeness.  My oven tends to run a little hot, so I think the cake was slightly over-baked: ten minutes less would have allowed a much thicker fudge vein.

The cake was good; the walnuts were a nice break from what would have been a total chocolate assault.  But the cake also had a greasy mouth-feel thanks to the million pounds of butter.  And it’s sooooo swweeeeeet.  I even made it with a cup less sugar than the Pillsbury recipe calls for.

I don’t know.  I’d be curious to have more people give this bizarre chocolate cake a whirl and tell me what you think of the final results.

Chocolate Delight: Chocolate Wafers

Chocolate Wafer cookies; from Gourmet, February 1950.

Faced with the task of consuming chocolate, I decided to reference a book that I had gotten for Christmas: The Gourmet Cookie Book: The Single Best Recipe From Each Year 1941- 2009. It’s a cool anthology that reflects the changing tastes of the last 70 years.  I wanted a rich, chocolately cookie, and I found this recipe for Chocolate Wafers from Valentine’s Day, 1950:

“Chocolate Wafers: Good cooks were pleasing their menfolks with chocolate cakes back during the early settling of the New England colonies…Modern ways are upon us, atom bombs bedevil our dreams, standardization of taste haunts our mealtimes–but chocolate is still chocolate.”

Intense!  But also inaccurate–chocolate cake recipes didn’t start appearing until the later half of the 19th century.  Just FYI.

***
Chocolate Wafers

From Gourmet magazine, Feb 1950
As Reprinted in  The Gourmet Cookie Book: The Single Best Recipe From Each Year 1941- 2009

3/4 cup Butter, room temperature
1 1/4 cups Sugar
1 tb Rum Extract (I didn’t have any, I used rum)
1 Large Egg
1 1/2 cups Flour
3/4 cup Unsweetened Cocoa Powder
1 1/2 tsp Baking Powder
1/4 tsp Salt

1. Sift together flour, cocoa, baking powder and salt. Set aside.

2. Cream butter.  Add sugar gradually and cream together until light and fluffy.

3. Add egg and rum. Beat thoroughly

4. With mixer on low, gradually add dry ingredients, mixing thoroughly after each addition.

5. When completely mixed, refrigerate overnight.

6. Roll out dough 1/8th of an inch thick; cut into fun shapes; bake in a 375 degree oven for 6-8 minutes.

***

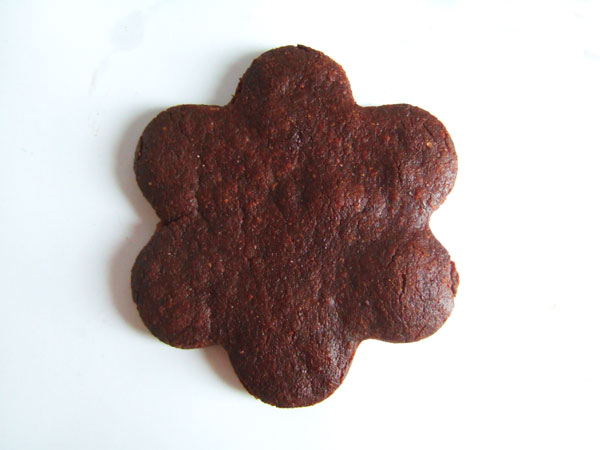
This recipes mixes up very quickly, but the dough is hellish to work with.  It was somehow both dry and crumbly and extremely sticky.  It did allow me to use some of my vintage cookie cutters as well as a vulgar cutter my roommate gave me for Christmas.

The cookies are tasty.  I liked the texture best when they first came out of the oven: they were really crispy and flaky.  They got a little more dense as they cooled, but still very good.  If I was going to make an artisanal Oreo, I would use this recipe.

These cookies are getting shipped off to Washington DC for a friend’s very belated birthday present.  Not the vulgar ones, though.  The balls got a little burned.

Chocolate Delight: Royal Hot Chocolate

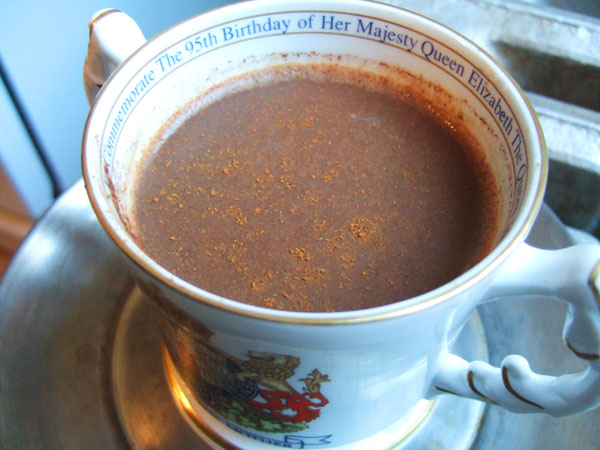
Royal Chocolate in a royal cup.

It’s cold in New York.  Reaul cold.  At the end of a long day, I needed a little pick me up.  So I cracked a cookbook my Aunt had given me for my birthday, a 1971 reprint of a 1934 Hershey’s Cookbook.

The book has been “adapted to a modern kitchen,” so that could mean anything in terms of reinterpretations of the original recipes.  But regardless, I do enjoy cooking up some 70s kitsch.

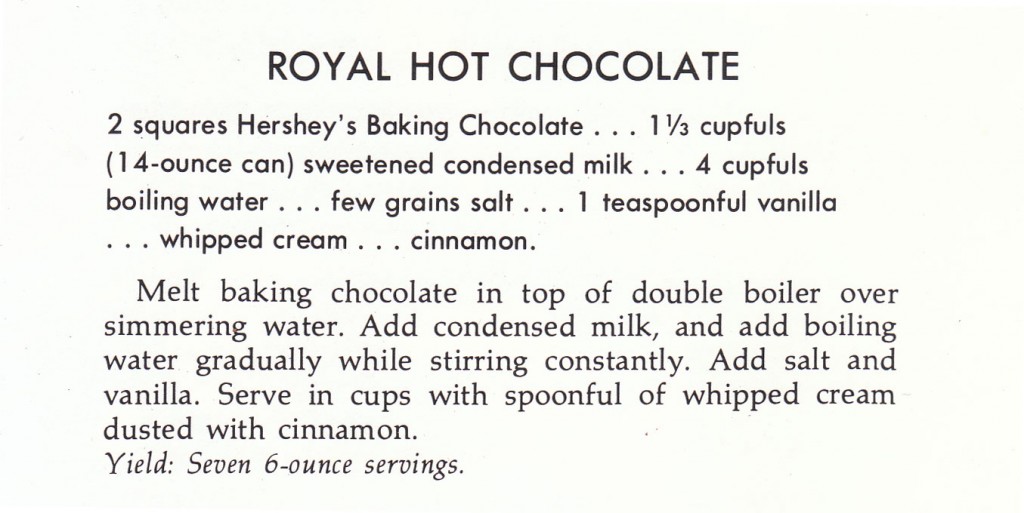
In the “Beverages” section, I came across this recipe for Royal Hot Chocolate.

Sounds so decadant!

***
Royal Hot Chocolate

From the 1934 Hershey’s Cookbook (1971 expanded and updated edition)

2 squares Unsweetned baking chocolate
1 14 ounce can sweetned condensed milk
4 cups boiling water
Pinch salt
1 tsp vanilla
Whipped cream and cinnamon (optional)

1. Melt baking chocolate in a double boiler: a glass bowl set over a saucepan of boiling water will do just fine.

2. Add condensed milk, then GRADUALLY add boiling water while whisking vigorously.  Heed this advice; I didn’t, and dumped the water in.  Despite some vigorous whisking, I ended up with grainy hot chocolate.  And the water must be BOILING, or else you’ll end up with a lump of unmelted chocolate and water.

3. Add salt and vanilla, and serve, with whipped cream and a dusting of cinnamon if desired.

***

Since it is Royal Hot Chocolate, I served it up in the royalest mug I had: A double-handled cup commemorating the Queen Mum’s 95th birthday.  When I first sipped the chocolate, I wasn’t bowled over.  But the more I drank, the more I realized how smooth it was.  How chocolately.  And not too sweet.  It was perfect in every way.  In a feat of decadence, I drank this hot chocolate while taking a hot shower.  I feel Awesome.

Chocolate Delight: Mahogany Cake

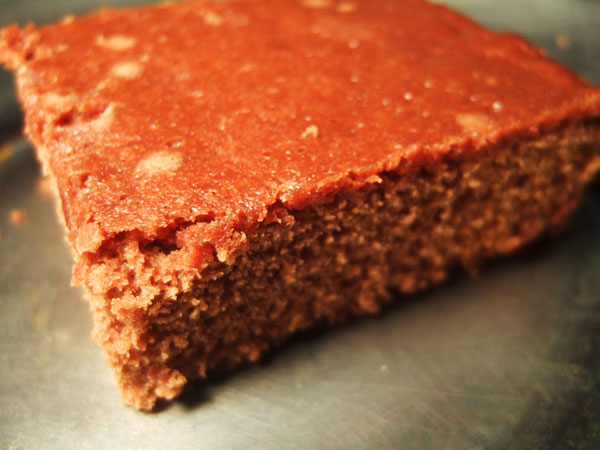
Mahogany Cake: cocoa powder and brown sugar.

Have you ever read A Cake Bakes in Brooklyn?  You should.  Some months ago, the author loaned me a book by a mysterious cake maven named Mrs. Osborne.  Read more about this fascinating woman, with a unique perspective on how to bake a cake, here.

I’ve baked one recipe from Mrs. Osborne’s book, a fairly unsuccessful Puff Cake.  But another recipe captured my attention, a brown sugar and chocolate confection called Mahogany Cake.

***
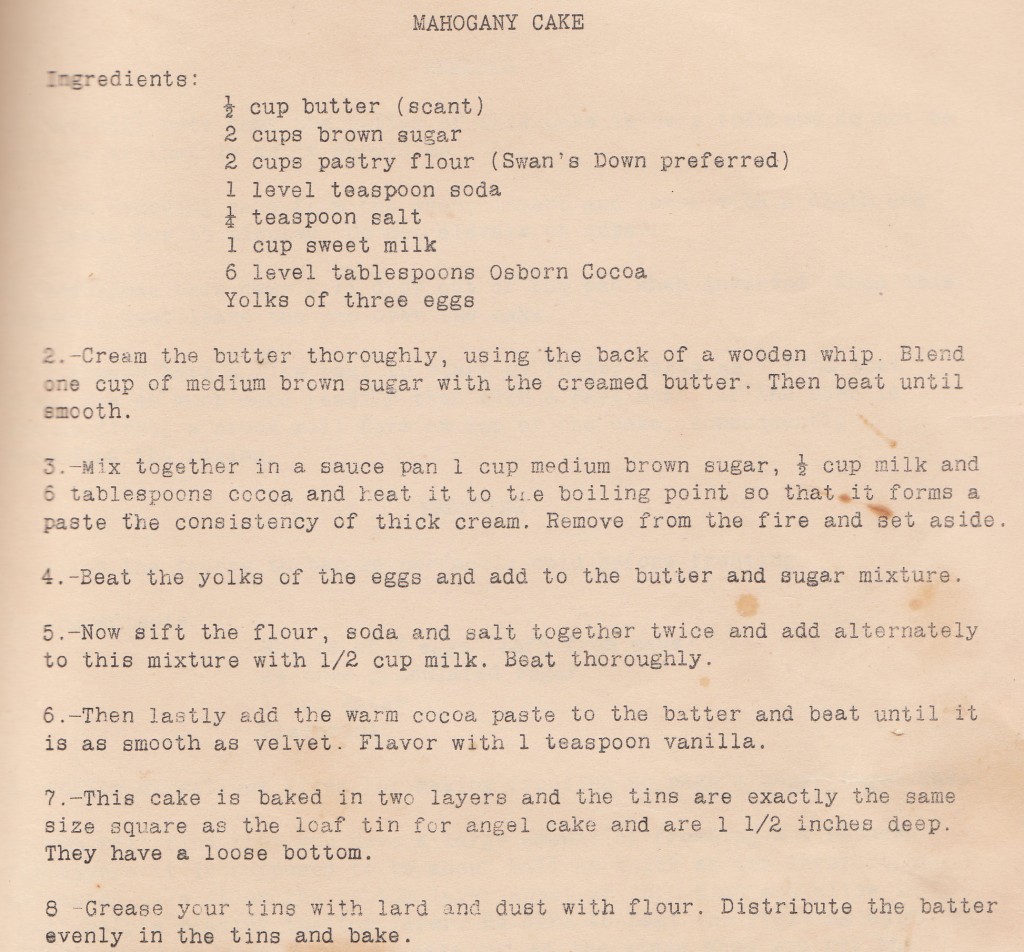
Mahogany Cake
From Mrs. Osborne’s Cakes of Quality, by Mrs. Grace Osborne, 1919.

I didn’t have the pans she wanted, so I baked it in a regular rectangular cake pan, which I buttered and dusted with cocoa powder.  The milk, sugar and cocoa powder comes to a quick boil, so watch out for that.  After I mixed the flour in, the batter was super smooth; when the melted chocolate was added, it was very velvety, just like Mrs. Osborne promised.  Don’t forget the teaspoon of vanilla at the end; she doesn’t list it in the ingredients.

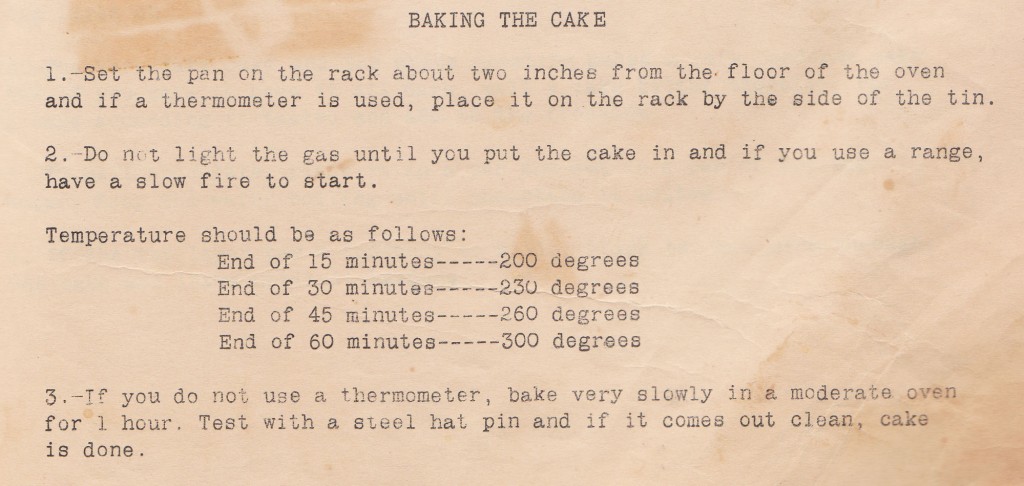
When completed, the batter tasted like hot fudge.  The cake showed promise.  But here comes round two, Baking the Cake.  Pay careful attention, it is detailed:

I ALWAYS managed to fuck this part up, because I forget to reset the timer.  That’s how the Puff Cake got overcooked and tough last time; this time I forgot to set the timer after 230 degrees.  So I went from 230 to 300 in the last 15 minutes. Grr.

The  results: the cake had a nice fudgy flavor.  I actually do not like chocolate cake (Short story: my mother was a prize baker, once she was testing a million chocolate cake recipes, I ate too much cake and puked.  Haven’t been able to stomach it since.)  but the flavor was rich enough I didn’t find it off putting.  But the texture was not great: although the top was most, the center and bottom of the cake was really dry and unpleasant.  That’s the same problem I had when I made the puff cake.

Mrs. Osborne’s ridiculous baking methods seem like they’ll be worth the trouble; they stink of some long forgotten baking secret.  But in reality, the long, low bake time seems to dry the cakes out.  Thumbs down, Mrs. O.